
Crate Update
This post may contain affiliate links. If you purchase something through the link, I may receive a small commission at no extra charge to you.
On Monday I told you that I was staining crates for a fun project that will hopefully be finished early next week. When I first told Chris that I wanted to build something he was a bit skeptical. The only d-i-y projects I’ve ever done are wall art and I have never built anything in my life. If I’m being honest, I was a little worried that I would somehow mess up this project too. So far though, it’s all been going well and Chris can’t stop saying how proud he is of me sticking to my guns and doing this on my own.
I have been obsessed with the idea of using crates in our home for a long time. If you follow me on Pinterest you can find a few dozen of the amazing crate pins I have bookmarked for future reference. Lucky for me, Chris is completely behind this recent fad. I hope he is ready for many more crate projects in the near future. Like I said, I’m obsessed!
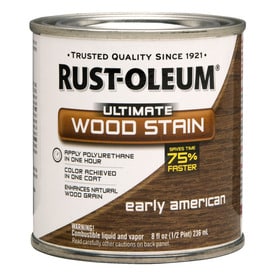
When Chris and I were discussing this project and what color we wanted to stain the wood, we both agreed that darker would be better. I had seen a fellow crafter use the Early American wood stain from Lowes and absolutely loved the finished product.
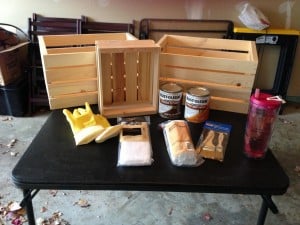
The supplies I used were:
- Early American wood stain
- Rust-Oleum Semi-Gloss Polyurethane Varnish
- Plastic drop cloth
- Paint brush
- scrap cloth
- A one inch piece of wood cut into three, eighteen inch pieces, and
- Two large crates and one small crate from Michaels.
It took three days to stain all the wood to the desired color. Word to the wise: make sure you shake the wood stain can before opening really well and mix it again with a paint stick once you open it. I spent five hours doing coat after coat of stain on Monday and I could not figure out for the life of me why the color was coming out so light. Especially when I had seen a picture of another crafter using the same kind of crates and the same stain color and the wood was dark! When Chris came home that night he took a look at the work I’d done and I could tell he wasn’t too thrilled about the color. Since Chris knew I was so excited about this project he didn’t want to disappoint me so he said he liked what I did but suggested to do a few more coats to see if I could darken the stain up a bit.

On Tuesday I decided to add a few more layers of the stain to try to get the darker color Chris and I both desired. The day before I had used pretty much all of the stain trying to come close to the dark color I liked with no luck. When I started applying more of the stain on Tuesday, the color came out three times darker! I guess I just didn’t shake the can well enough and all of the stain sat on the bottom. Man, I felt like an idiot. I only had to apply the stain twice to get the color I wanted and then let it sit overnight to dry.

Today I had to flip the crates over and stain the remaining pieces of untouched wood. I can’t tell you what a relief it was to know that it was only going to take about an hour to finish this part of the process. My feet are still hurting from Monday’s five hour standing session! After today I’m going to let the crates sit for 48 hours just to make sure that they’re dry before I apply the varnish. Since I’m not a patient person I am not at all excited to have to wait until next week to see how this whole project is going to come together. But, I know that it will be worth it.