
DIY Harvest Wreath
This post may contain affiliate links. If you purchase something through the link, I may receive a small commission at no extra charge to you.
Last year I had a Pinterest Party where we all made Fall or Winter wreaths. I really liked the wreath I made, but I had it on the back of my front door for a year and felt like it was time for a change. Why did I have it on the backside of my front door you ask? Because my husband kept voicing concern that someone would steal it if it was on the front. So, it stayed hidden from sight so that only we could see it. It’s a shame really.
I was determined to make a new wreath. One that I could change out with the seasons and one that would (hopefully) last for a long time. And after seeing another neighbor hang a very similar wreath on her front door, I knew that mine would be safe if I chose to do the same.

Supplies:
- 12″ Wire Wreath Base (bought at JoAnn Fabrics)
- Chipboard (already owned)
- Chalkboard Paint (already owned)
- Green Ribbon (already owned)
- Pumpkin (bought at JoAnn Fabrics)
- Two rolls of Burlap (bought at JoAnn Fabrics)
- Lace Ribbon (already owned)
- Harvest Leaves (bought at JoAnn Fabrics)
- Wire (already owned)
Let’s Get Started!
To begin, you want to take a piece of wire and thread it through your burlap. This is how you’ll attach it to your wire base. Then you will want to tie the burlap to the front of your wreath base. The wire is kind of tricky to work with so it may take you a few tries to get the burlap tied nice and tight.


Next, you will start making the loops with your burlap. Loop the burlap through the top, middle, and bottom opening. I liked to fluff my burlap out as I went so I could get a good visual of how it would look later on, but you can always put that off until later.
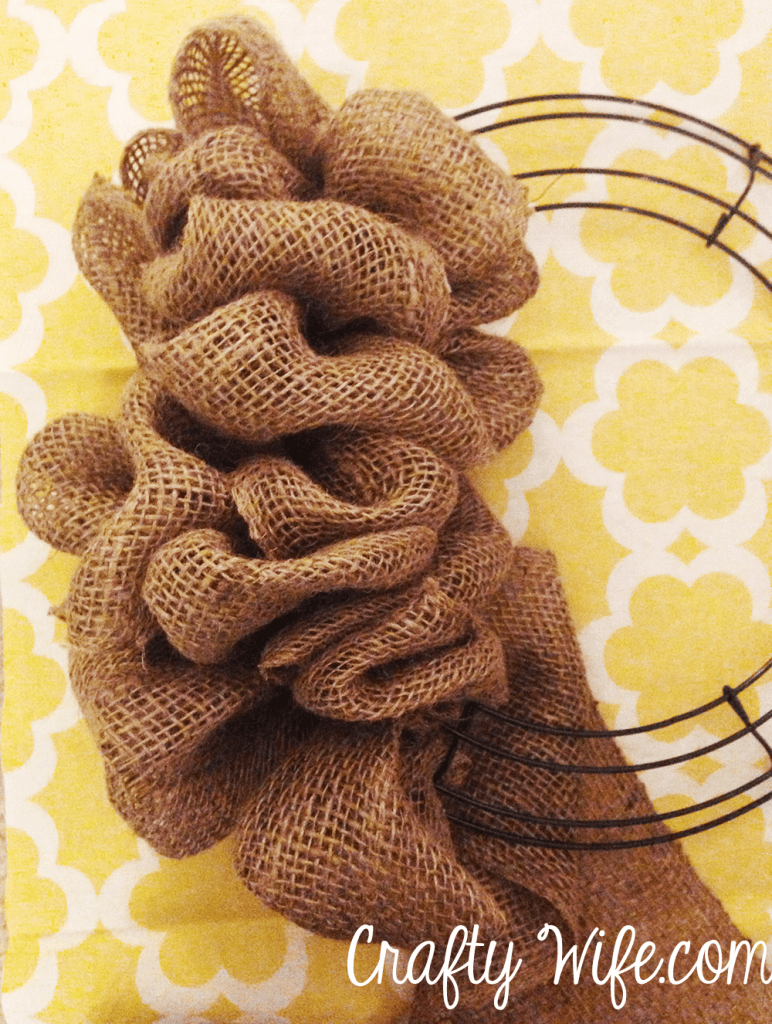 Occasionally you will want to push the burlap loops together so your wreath will be nice and full. If you don’t, then you’ll have a very loose wreath with lots of space in it (not my style, but it might be yours!).
Once you are done looping all of your burlap your wreath should look very similar (if not identical) to this:

And now you can start adding embellishments! I really liked the idea of lace ribbon on top of the burlap, so I gathered the lace every few inches and tied it with my wire. I then threaded the wire through the burlap and tied it in place.
 Next I added my harvest leaves, ribbon, and pumpkin. I also tied all these on with a wire so I can easily change them out with the season if I want.
And, as a last-minute addition, I decided to paint a piece of chipboard with chalkboard paint.

I then cut my chipboard down to the size I wanted and hole punched it so I could attach it to my wreath.

I had to bring a little bit of my country roots to the suburbs of Washington DC!
 And then, my wreath was ready to hang on my front door!
 I love the way it came out! And apparently so did my neighbor who hung out of her window just to tell me how much she liked it (which was so sweet of her!).
Are you a fan of the burlap wreath trend?
So cute! I love new fall wreaths! I just make one that I’ll be sharing this weekend 🙂 Thanks SO much for linking up with us for WDW!
Thank you! Wreaths are my weakness. 🙂 I can’t wait to see yours!
This is absolutely adorable! Stoppin by from the Blog Strut! Have an amazing weekend!
The perfect post to usher in Fall.
Visiting today from the Peacock Strut Hop. 🙂
Thank you!
Thank you!
Your wreath is really cute! I made a burlap wreath for the first time this year and for the life of me had a hard time figuring out how to start the thing! I finally got the hang of it and of course it wasn’t hard so I don’t know what my problem was 🙂
Thank you! I had a hard time at first, until I found this really great tutorial on Pinterest. Then I felt silly for making it so much harder than it really was. 🙂
Very cute Teresa! I love all the fun Fall embellishments you added too!
Thank you, Mackenzie!
I love it. It is so cute!
Thank you Lindsay!
Great tutorial and cute wreath! Shared and pinned!
~ Ashley
Thank you so much Ashley!
I love this!! The chalkboard is such a cute touch! Love love love it!
Thank you, Jenna!! 🙂