
DIY Layered Vinyl Harry Potter T-Shirts


This post may contain affiliate links. If you purchase something through the link, I may receive a small commission at no extra charge to you.
These layered vinyl Harry Potter T-Shirts are easy to make with your Silhouette Cameo and the Designer Edition of the Silhouette Studio Software!
These Harry Potter t-shirts are brought to you by ShirtSpace, but the content and opinions are that of Simply Made Fun.

If there is one thing I will always regret it’s not making more Harry Potter t-shirts to wear to the midnight release of the books and movies.
Back then making t-shirts meant using puffy paints and mad drawing skills and hoping and praying that your shirt came out looking somewhat like you pictured in your head. Mine never did, I’m a terrible artist.
This is why I’m thankful for cutting machines. They make crafting easy and quick!
Which is awesome and also a bit dangerous.
My obsession with making t-shirts is maybe a little unhealthy.
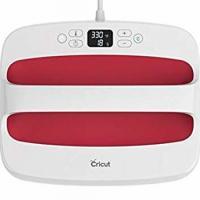
I love working with heat transfer vinyl (it’s so easy to weed!) and using my Cricut EasyPress makes cranking out shirts really fast.
It also helps because there’s no guessing as to how long you need to press your designs for. There’s an easy guide on their website that tells you exactly how long you should press your designs depending on what material you’re pressing them on to. It literally takes the guess-work out of it for you!
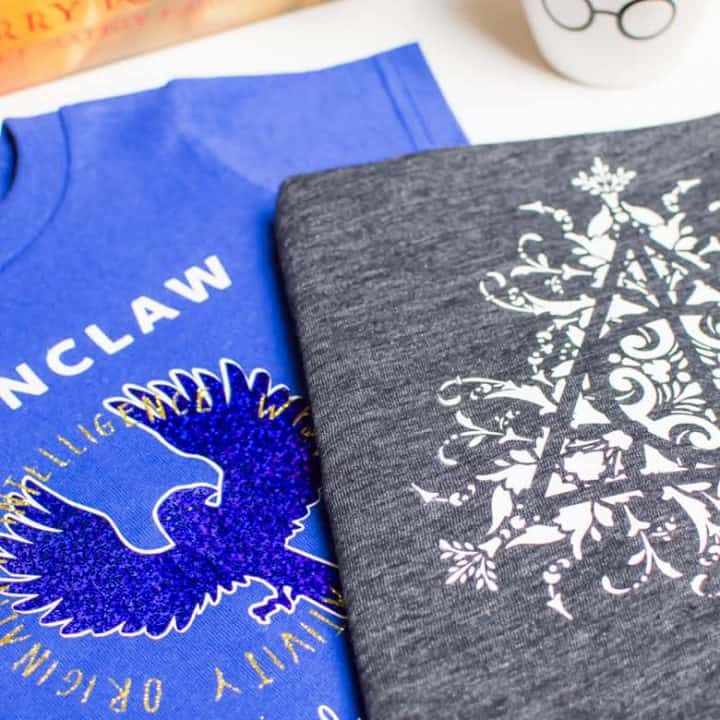
The only time you wouldn’t want to go by that guide is if you’re pressing multiple layers (like you would with the Ravenclaw shirt). For multiple layers you would press the first layer for 15-20 seconds and do each layer after that for only 5-10 seconds.
Want to make sure your shirts look their best? Grab the HTV Placement and Sizing Guide!

Are you doing a complicated layered design? Read on for tips on how to get it right the first time!
How do you get the Silhouette Software to cut out multiple colors without having to go in and ungroup/unclick everything?
The Silhouette Designer Edition really helps in multi-layer designs because you can cut by color or layer. This made it really easy to cut my son’s Ravenclaw shirt because all I had to do was change out the vinyl on my cutting mat, click the color I wanted to cut in the software, and hit cut.
Do you need the Silhouette Designer Edition to cut layered designs?
No, not at all. It does make it easier but it is not a necessity.
How do you line up the layers correctly when pressing multiple layers of vinyl?
Honestly, I eyeball it. I know that most people like a more technical answer than that but eyeballing it is what I do.
However, if you want a more full proof plan you should do all three of these things:
- Fold your shirt in half and iron a crease down the middle.
- Add small boxes above and below your design in the Silhouette software, directly in the middle.
- After you cut your layers (make sure you cut the boxes with each layer) gently fold the design in half (don’t crease the vinyl, just your transfer sheet!). Use the boxes as your guide then remove them before putting your vinyl on the t-shirt. Use the crease on your shirt to line up the vinyl design.
If you do all of these things I have no doubt that your shirts will look 100 times better than mine typically do. I rush and therefore not everything of mine is straight. I really should get better about that…?
Will the vinyl shrink when it’s pressed?
It can and I have done it before! When that happens it definitely looks like your design is off.
To help stop this from happening you should only press for a short amount of time with each layer!
What happens if I screw up and ruin the vinyl?
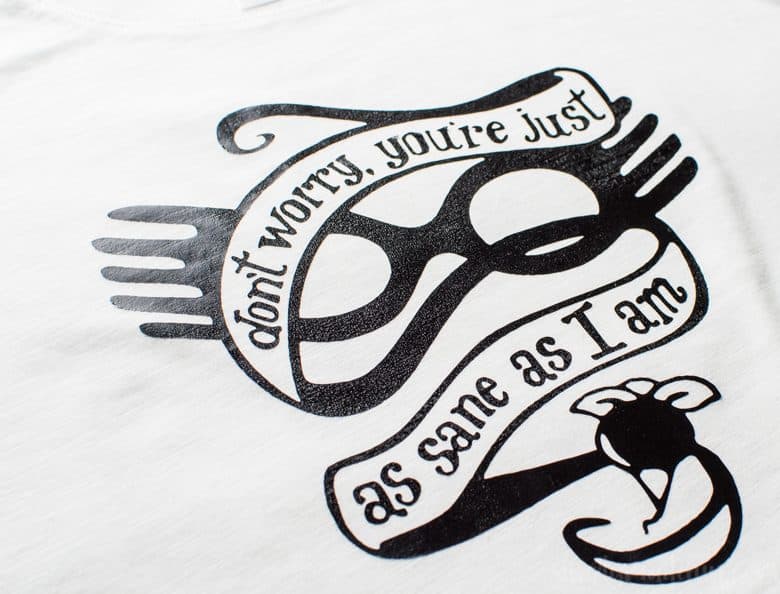
Well, that’s exactly what happened with my Luna shirt! When I made the Luna shirt and accidentally put the hot iron on the already pressed vinyl when doing my second layer. It warped the vinyl and my shirt was ruined. I was bummed.
But….there is a way to remove vinyl (easily) if you mess up! I wrote a whole post about the $20 miracle bottle that’ll remove vinyl from a shirt so you can start over! I wish I had that when I was making these shirts.
If you’re still a little worried about trying more than two layers (the Ravenclaw shirt was three!) find a simple design and start there. But make sure you have your bottle of miracle remover with you, just in case!
These Harry Potter T-Shirts are:
- easy,
- fun, and
- incredibly nerdy!
Let’s make our own layered vinyl Harry Potter T-Shirts!
Harry Potter Shirts
Learn how to easily layer multi-colored vinyl Harry Potter T-Shirts with the Silhouette Designer software!
Materials
- Shirts from Shirtspace
- Heat Transfer Vinyl
- RAVENCLAW SVG design
Tools
- Silhouette Cameo
- Cricut Easy Press
Instructions
- Download the RAVENCLAW design and load it into your software. To figure out what size design you should cut, reference the HTV Placement and Sizing Guide.
- Cut your design and weed it. Set it aside.
- Heat up your Cricut EasyPress and fold your shirt in half. Check this site for the correct settings for your EasyPress.
- Use your EasyPress to press the crease of your shirt. This is how you tell where the center line of your shirt is!
- Place the design on your shirt and put a teflon sheet on top of it. Use the EasyPress to press your design on the shirt.
- If you pull up the carrier sheet that is on top of your vinyl design and the vinyl pulls up with it, put the carrier and teflon sheet back on top of the vinyl and repress until the vinyl is fully pressed on the shirt.
Recommended Products
As an Amazon Associate and member of other affiliate programs, I earn from qualifying purchases.


I LOVE HARRY POTTER! You are making me want to go out and purchase a Silhouette Machine. I entered your Giveaway as it’s something I never even knew existed! Thanks for the opportunity
Thank you Shirley! The Silhouette machine is so addicting and so fun to use. Thank you for entering the giveaway, there are some awesome prizes to win this year!
Ok – admitting I have not read Harry Potter (I know, gasp…), but love these tees! You make it look pretty easy to do, so I may try this DIY out!
Karen | GlamKaren.com
Wow your designs look so professional! Never would have guessed they were home made. Great job!
Thank you so much Anna! They were a lot of fun to do!
Cool designs! When I taught fifth grade, Harry Potter was all the rage. I know my students would have loved to wear these shirts to school!
Thank you Terri! I wish I had shirts like this back when all the books were coming out. I would’ve worn them everyday! 🙂
I love Harry Potter SO much.
I am going to have to share this with all my HP friends. One of them just threw HP themed birthday party for her daughter and went all out. These would have made a great addition!
My kids are just getting into Harry Potter! I love the Silhouette Machine and all it can do to make fun things like this!
I absolutely love Harry Potter! I am trying to get my boys into it now. These are really cute.
These turned out so good! I love the Happy Harry Potter series, I look forward to it every year!
That Ravenclaw tshirt looks really cool. I can’t believe you made that yourself. I think my husband would like one of those.
These are fantastic! We are huge Harry Potter fans and I would love to do this activity at home with my kids
I can’t tell you how much of a Harry Potter nut I am… myself and my eldest son. We are soooo going to do this as a craft activity this summer.
What an awesome prize pack. We’re a family of Harry Potter fans.
How amazing are these designs and I love the idea of making your own prints! What a way to customize a shirt! Very original and definitely worth the effort. Thanks for the quick tutorial and that awesome giveaway!
Wow, I am really impressed by the quality of these designs. I would totally purchase these in a retail store if I saw them for sale.
After seeing this post, I think I need a Silhouette machine in my life. I would love to take T-shirt making to the next level.
These look great! I’m a huge Harry Potter fan and love everything to do with it.
These are so cute! I am a big HP fan and am so excited that there is another installment.
It’s so funny, I own a Cricut and I still haven’t taken it out of the box. Can’t wait to use it and make something fun like this.
These are adorable! I am sharing these with my readers too. I know so many families heading to HP World too.
As a huge Harry Potter fan, I am in love with these designs! The quality is incredible.
Wow! These are great! They seem pretty simple. My kids are a bit too young to be into Harry Potter but I will have to save this for when they are.
I honestly never read the books or watched the movies, but these designs are insanely cute! I know a few people that would love them. – HilLesha
Omg how awesome are these shirts!!!! Perfect for all the Harry Potter fans of the world!
Well I love Harry Potter and this shirt is is freaking awesome. i can’t believe its not shop made it looks so professional!
Love these shirts! I made shirts for the Twilight movies, yes I admit it, and it would have been much easier with my Silhouette!
Just out of curiousity, where do you find your designs? I’m a new silhouette user and I’m looking for inexpensive/cheap designs. But I’m not sure where to start. Especially when it comes to finding HP images. Help!
Hi Emily! I’m in a few Silhouette groups on Facebook, the main HP one being Accio Cameo and it is great! Silhouette Cameo Project Inspiration is another good one for all sorts of files!
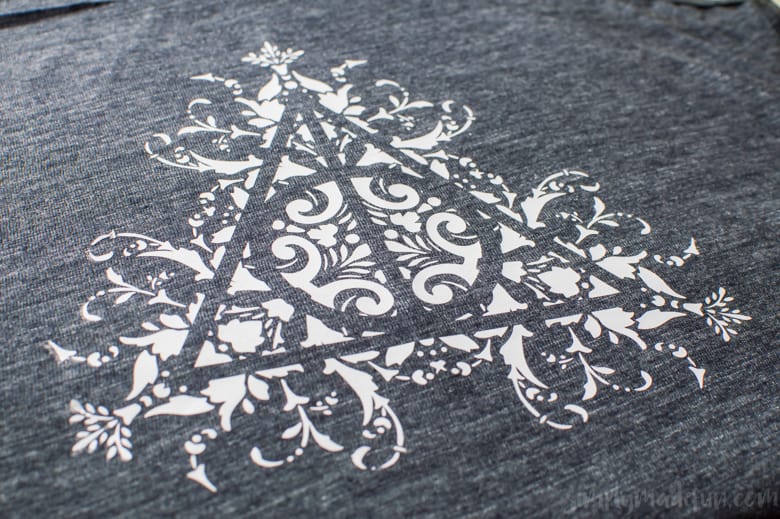
OMG that Deathly Hallows file….swoon. I NEED IT. any chance you’re willing to share where you got it/if you made it are you willing to sell the file??
Hi Regina! I got the file from a Silhouette facebook group called Accio Cameo!
Hi, i love your posts they are great. Would you share or sell the deathly hallows design i would love to make one for my daughter.
Hi Siobhan! Thank you so much. The Deathly Hallows file isn’t mine to share, but if you join the Accio Cameo fb group you’ll have access to it and other awesome HP files as well!
Love it! Do you happen to have the cut design for the luna shirt? My daughter would LOVE it and we go to harry potter world in 2 weeks!! Thanks!
Hi Ashley! I got it from the group Accio Cameo on facebook! You can join it and get the file there. Unfortunately I didn’t make the file so I don’t have permission to hand it out myself. 🙂
Have fun at Harry Potter World! It’s amazing!
Hi, the link to the Ravenclaw file isn’t working. It says ‘404 the file isn’t here anymore’. Is that one on the Accio Cameo fb group? i’m in that group, but couldn’t find this one. thanks!
Hello! That is a file from the blog! I’m sorry the link is wrong. I’ll fix it later today and come back to comment so you can grab it. Thanks for letting me know!
When I go to download the Ravenclaw file it says it’s not there, is there anyway to still download it?
Thanks for brining this to my attention Kris! I’ll fix it today and get it back up so you can download it. 🙂
Is the Deathly Hallows SVG/DXF somewhere? I keep looking for it and I cannot find it. And the Ravenclaw thing is down again… Thanks!
Hi Christine! The Deathly Hallows file is in the Silhouette group Accio Cameo on Facebook!
The Ravenclaw file is back up! I switched systems and there have been broken links popping up here and there. Thanks for bringing them to my attention!
I absolutely LOVE the deathly hallows design here! Where can I purchase the SVG?