
Make-Up Bag Tutorial
This post may contain affiliate links. If you purchase something through the link, I may receive a small commission at no extra charge to you.
I am all about the simple and adorable sewing projects that are great for beginners right now. My favorite project at the moment are make-up bags or small zippered bags that can be used for anything and everything.
For my sister’s birthday I made her a large make-up bag (she loves her make-up!) to put all of her supplies in. Little did I know that she actually needed a new one!
The supplies I bought for this project were:
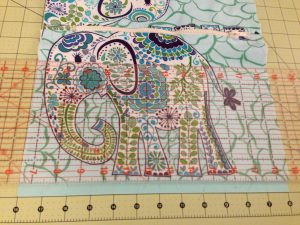
- One and a half yard of Elephant fabric from fabric.com
- Half a yard of Polyurethane fabric from fabric.com
- One yard of Fusible Interfacing from fabric.com
- (1) 9 3/4 inch white zipper from Joann Fabrics
All seam allowances are 1/4 inches!

To start, I cut six (6) pieces of fabric 12in by 8.25in and two (2) pieces of fabric 3in by 2in.

I then drew lines half an inch from the outside of my two (2) smaller pieces and ironed them down to create a fold. I found a really helpful tip that says to sew two (2) small pieces of fabric onto each side of you zipper. That helps keep everything in place and gives you a bit of extra fabric to work with when you’re sewing the zipper. I swear, it’s the best tip I’ve ever found!


The next step is to pin (I find this easier but you do not have to pin your fabric!) the fabric to the zipper and sew it! I have to hand sew zippers because my machine didn’t have the zipper attachment included but I’m slowly getting faster. To be honest, I’m just too lazy to go to the store to buy the foot attachment. Even though I know it would be so much faster to use it!

Adhere the interfacing to the back side of your exterior fabric per the instructions on the paper. Fold the top of the fabric/interfacing over by half and inch and press with your iron.

After you’re done sewing the exterior/interfacing onto the zipper, your bag should look like this.
Cut off all of the extra fabric at the bottom to make sure everything is even before you start the next part of the project!
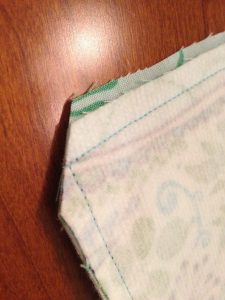
I forgot to take pictures of this part but sew all three sides of the fabric inside out. Then do the same with the exterior/interfacing fabric but leave a two inch hole in the side so you can flip the bag right side out after. Make sure that you snip the two corners of the exterior/interfacing at an angle (don’t snip the seam!).
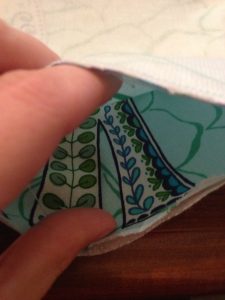
Flip the bag right side out through the small hole you left and sew it up using an invisible stitch.

You’re done! This is what your finished bag should look like.
I love the idea I had of using waterproof fabric for the inside of the bag, just in case something spilled and the bag needed to be cleaned out. Honestly, I ended up loving the bag so much that I made one for myself. Just in time for my tri!. And let me tell you, this bag worked great! It held everything we needed them to and looked stylish while doing it.
Stopping by via #SITSBlogging to say HI! I have been looking for a tutorial just like this so I can make my own. This is fabulous! Pinning for future reference!
Thank you, Thea! This bag has been used and loved on a lot. Glad you like the tutorial!