
How to Organize your Link Party Page
This post may contain affiliate links. If you purchase something through the link, I may receive a small commission at no extra charge to you.
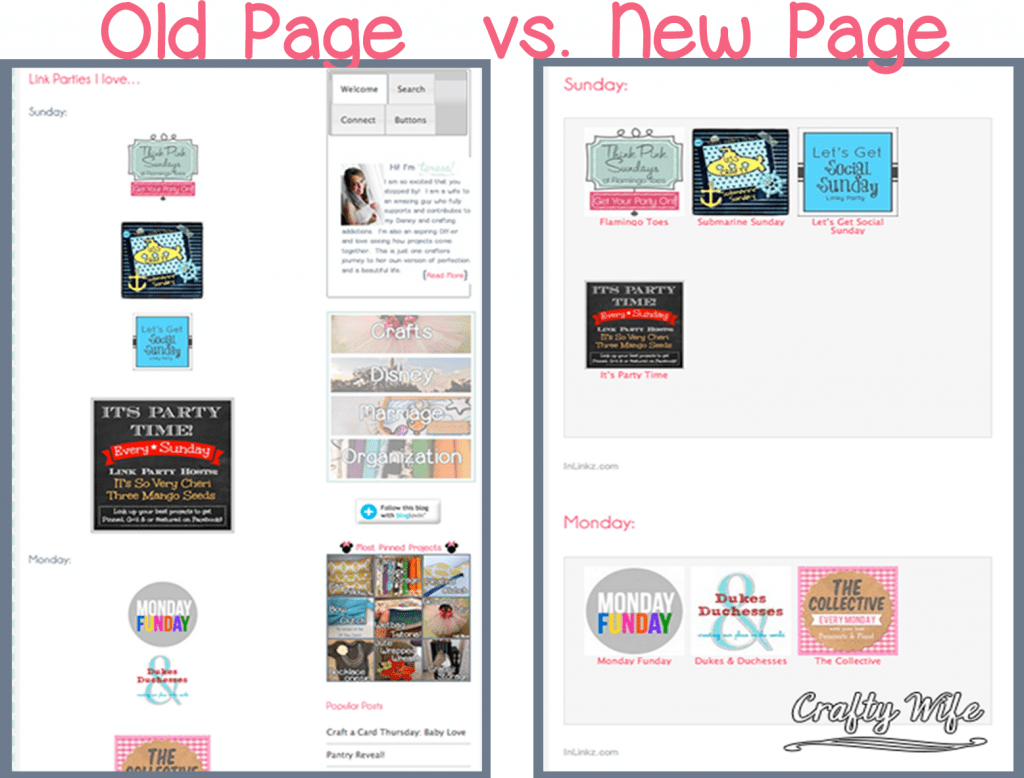
I have always hated how my Link Party page looks. The thumbnails were unevenly spaced (my OCD insides were screaming!), all the buttons were different sizes, and everything just looked extremely unprofessional. There had to be a better way to organize things.
Then, I came across a post about using InLinkz to organize all of your old posts. After looking into it and realizing what a fantastic idea it was, I decided to try it on my link parties page.
Depending on what you’re using Inlinkz for, you can use it for free. Since I’m using it for old archives and link parties, I don’t have to pay a dime. But, if you’re hosting a link party then you will have to pay for some of the services. It’s very reasonably priced though so it will not be hard on your wallet.
Okay, let’s get started on the Link Page tutorial!
If you already have an account, go ahead and sign in. If not, sign up and activate your account. Then, you’ll have to choose whether you want to use the link-up tool or the project manager tool. Click the project manager because we’ll be working exclusively in the dashboard.

This is what my dashboard looked like before I got started.

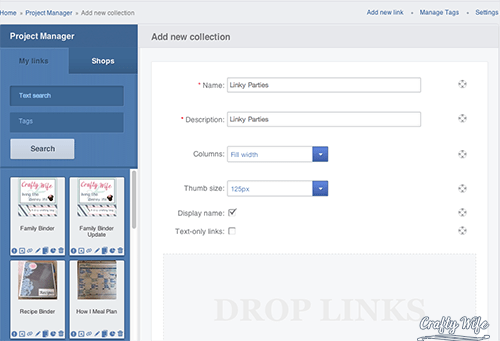
Next, you’re going to click Add new collection, which is above the dashboard. A collection is what you’re grouping links under. So, for this project I made a collection called, “Linky Parties: Sunday”. I have used the same title for the Name and Description just because I don’t see the need to make them different (I don’t think it matters anyway). You also always want to make sure the columns are full width so it looks right when you finally post the code on your page. How big you want your thumbnails and whether you want to display the post name is up to you.
Once you’ve made a new collection you’ll have to start adding your links. Since I re-did my link parties page, I put the name of the link party in the first four boxes. Then, I put the link to the website in the URL box.
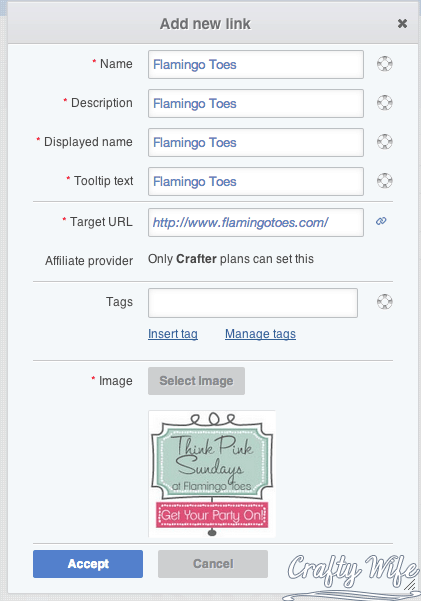
Once you’ve filled in all the boxes it’s time to add your photo. There are a few different ways to do this:
When I was working on my archives pages, I used the Select from web page tab because I was linking the picture to a specific post. For the linky parties page I wanted to use a specific picture that was (usually) not on the home page of the blog it originated from, so I used the Image URL tab.
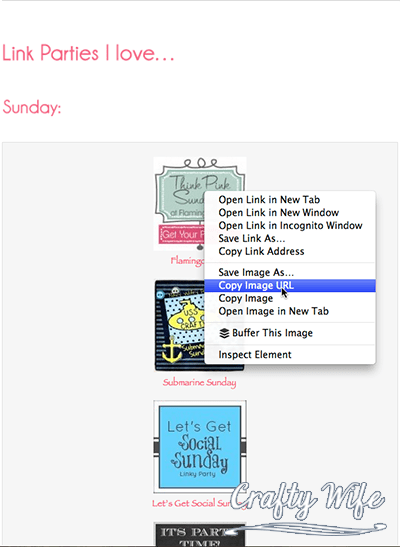
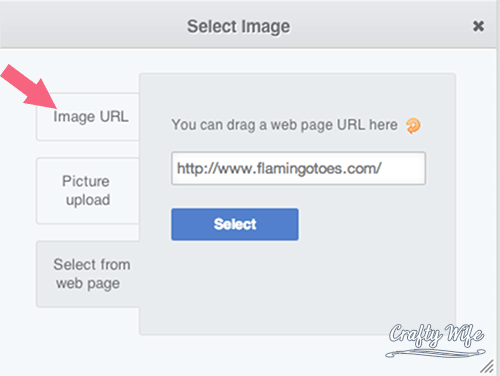 I went back to my link party page and right clicked on a picture. Then, I clicked ‘copy url image’ and pasted that into the Image URL tab on the InLinkz page.
When you get to the point where you can crop your photo, you’ll see a little box that’s checked that says Square Thumbnail. I love having everything the same size, so I check it. You don’t have to. Especially if you need the entire picture to show up on the page.

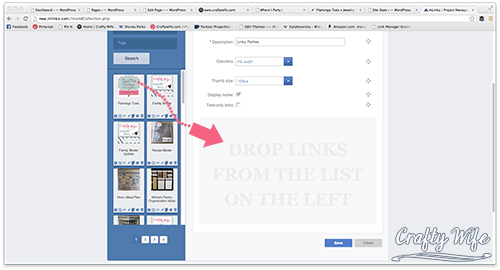
Once you’ve gotten all of that done, you’re going to add the new link to your collection. Just drag the link from the left size of the page into the grey box (see below).
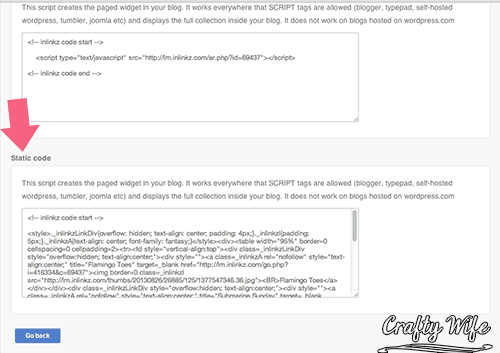
Once you’ve loaded all the links you want in your collection, it’s time to get the code for your website. Click the get script tab (it’s blue) and it’ll take you to where you need to go.

If you’re putting the code on a page, grab the static code (that’s what I used). If you want to put the links in the sidebar, grab the script code.
After you’ve gotten the code, put it on your blog in either a page or sidebar depending on what you’re using it for. I used it for my link party page so the code was put in a page. And now, my link party page looks great!
Let’s have one more look, shall we?
So, what’s so great about InLinkz?
- Anytime you add something new to your blog you can easily go back and add it to InLinkz. You just have to copy and paste the code into your page or sidebar, update it, and you’re good to go!
- It’s FREE! I honestly can’t say this enough. I mean, who doesn’t love free things?
- It’s user-friendly.
- You can use the exact same method above to organize and categorize your archives.
What have you used InLinkz for lately? Or do you use another plugin or code that you like better? Let me know in the comments below!
THANK YOU FOR SHARING THIS! I hate my Linky Party Page, and I could not figure out how to get them to LOOK GOOD! 🙂 🙂
I’m glad you found this helpful! I know what you mean, I hated my Link Party page before too. Now, I just like to go and look at how pretty it is! haha
Thank you so much for this! I’ve had the exact same problem and had no idea how to fix it!! Thank you, thank you! Found you on The Blog Strut.
You are so welcome! I’m glad you found this post useful and will be able to put it to good use! It’s always nice when you finally figure out how to fix the one thing that is bugging you! 🙂
Great information and tutorial. This is something I will be working on this weekend.
Visiting from the Blog Strut and following via Bloglovin’
Barbara @ http://www.allmylivesnow.com
Thank you for this post. I will give it a go!.
You’re welcome! I hope you find it useful! 🙂
Thank you!
Awesome post! I would love for you to link up at the TGIF Link Party at A Peek Into My Paradise. http://apeekintomyparadise.blogspot.com/2013/09/tgif-link-party-19.html
Have a terrific weekend!
Found you at Give Me the Goods and pinned this for when I make my link party page! Nicely done!
Thank you!
Hi there! Stopping by from Wake Up Wednesdays. Such great information on your tutorial!! I’ve been at a stand-still regarding organizing buttons, and your information comes at the perfect time. Thank you for compiling and presenting it in an organized fashion. Pinning!
Hi! Thanks for stopping by! Glad this tutorial found you at the perfect time and it can in handy. 🙂
I was wondering where I saw this post! I’m in the process of doing this. It’s time consuming but well worth it. But really it’s only time consuming because I get distracted with the Linky Parties and link up! Multi-tasking for the win!
It’s definitely time consuming and I couldn’t wait until I was done with it! I used it to organize my archives pages too, but now it’s so easy (and quick) to update it whenever I join a new link party or add a new post. Glad this tutorial was useful! Have fun multitasking! 😉