
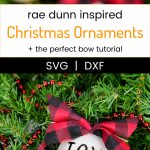
Rae Dunn Inspired Christmas Ornaments


This post may contain affiliate links. If you purchase something through the link, I may receive a small commission at no extra charge to you.
Want to make your own easy Christmas decor? These Rae Dunn inspired Christmas ornaments are so easy to make. Just cut the vinyl, apply it, and display your finished ornaments – perfect for beginner crafters!

Christmas is coming and I am making all the things with my Silhouette Cameo!
I love this time of year but I always feel like it sneaks up on me way too quickly. So this year I’m trying to get ahead of the holiday madness with my Silhouette machine.
I’m making ornaments, home decor, and all kinds of fun gifts for family and friends. This machine is a workhorse and it’s definitely getting overworked this season!

Did you know that Christmas ornaments are one of the most popular crafts to do this time of year?
And even so, I always see people asking what the trick is to lay vinyl on round surfaces.
It can be incredibly frustrating when your vinyl won’t lay flat on the ornaments or you get bubbles. And it can make you want to throw in the towel and give up on Christmas ornaments altogether. Or you could go grab the M&M style flat ornaments that I used here!
The past few years I’ve been into making my own ornaments. These Glittered Ornaments were perfect when I had a newborn because they’re plastic and he couldn’t pull them off the tree and hurt himself. The following year I decided to do a nerdy tree and made these Fantastic Beasts and Where To Find Them ornaments to go with these super easy Paper Harry Potter Ornaments.
This year I decided to do these Rae Dunn inspired Christmas ornaments because everyone is obsessed and these ornaments are so cute!

If you have young kids in your home you may not want to buy the glass white ornaments for this project like I did. My toddler isn’t too interested in pulling the bulbs off of the tree so I don’t have to worry about it as much with him but my nephew likes to take them off and hide them around my house.
Right now all the glass ornaments go pretty high up on the tree just to be safe.
And if that is something you worry about you can make plastic white ornaments via the glittered ornaments tutorial. I actually think they’d look pretty cool with white glitter!
Want to make these Rae Dunn Inspired Christmas Ornaments? Read these tips before you get started!
How big should you make the decals on the ornaments?
This depends on how large your ornaments are but I made my decals 2 inches tall and 2.5 inches wide. Smaller would also work too, just don’t go too big or you’ll have a hard time getting the text to curve with the ornament.
What type of ornaments should you use?
These ornaments are the white ones from Hobby Lobby. I opted for the glass ornaments, however you can also use plastic if you’re worried about them breaking!
Make sure you use coupons on the ornaments because they can get pricy if you’re doing your entire tree with them.
I personally love mixing it up a bit and getting smaller red and black bulbs to put on the tree with them.
What settings should you use in the Silhouette Software to cut small letters?
I don’t know about you but I have such a hard time cutting and weeding smaller designs. Since these letters are thin you want to make sure your speed is slow so the blade doesn’t accidentally pull an entire letter with it while it’s cutting the rest of the design.
Slow your speed down to 1 or 2 while cutting these phrases. If you’re still having trouble you can head to this post and read more on cutting and weeding small designs successfully!
How do you prevent the vinyl from bubbling on the ornaments?
Let’s solve this problem in three easy steps!
- Cut the transfer tape as close to the vinyl as possible.
- After that, cut small slits around the letters (be careful, you don’t want to accidentally cut the vinyl!). This will help the vinyl “give” a little as you’re placing the letters.
- When you’re ready to lay your vinyl decals on the ornaments, press the center of word down first. Work from the center out.
There’s a video for this post that shows you exactly what to do if you get stuck!
How do you make the bows and attach them to the ornaments after you’ve put the vinyl decals on?
I made mine using a really simple tutorial a friend shared with me, after that I tweaked it a bit and decided to make a video to share with all of you!
Do you need to seal the ornaments after putting the vinyl decals on them?
I did not and I don’t think you should as long as you’re using Oracle 651, permanent vinyl.

These Rae Dunn Inspired Christmas Ornaments are:
- easy,
- a quick craft project, and
- perfect rustic decor!

Rae Dunn Ornaments
Materials
- White Glass Ornaments (from Hobby Lobby)
- Buffalo Chex Ribbon (from Hobby Lobby)
- The Skinny font
Tools
- Silhouette Cameo
- Permanent Vinyl
- Transfer Tape
- Hot Glue Gun
Instructions
- Design your phrases and then cut them out with your machine and weed them.
- Peel the backing off your transfer tape and put it on top of your newly weeded phrases.
- Rub the tape over the letters and then peel up the transfer tape. (if the letters aren’t coming up, put the tape back down and continue rubbing the tape until all the letters come up)
- Cut the transfer tape as close to the vinyl as possible. I also like to cut small slits around the letters (be careful, you don’t want to accidentally cut the vinyl!). This will help the vinyl “give” a little as you’re placing the letters.
- Carefully put the phrases on your Christmas bulbs. I like to put the middle down first and press down in a straight line. Then I press down the top half of the phrase before moving on to the bottom half.
Notes
- The font I used is THE SKINNY from dafont.com. You can download it and use it for personal use only on your computer!
Recommended Products
As an Amazon Associate and member of other affiliate programs, I earn from qualifying purchases.


If you’re on a mission to get more handmade this year, I’ve got a few projects you need in your home!

More Holiday Fun!
[pt_view id=”e6c5d75u73″]
You made that look so easy with your video and I am so bow challenged haha. These turned out oh so cute!
Thank you! I swear I feel like I am the worst at bow making….it’s a miracle these turned out the way they did! haha If you make some take pictures and send them to me. I’d love to see them!!
What heights did you make the letters
Also what size ornaments. I got ornaments from Hobby Lobby. I think they are 4 inch. Great job on yours.
Hi Marjorie! Thank you so much, I absolutely adore how they came out! These are the 4 inch ornaments as well and the design is 1.6in high and 1.7in wide. You could probably make them a tad taller, but I wouldn’t go above 1.7, just to be safe!
Do you happen to have all the words as an svg? I can trace without downloading the font file.
Hi Jennifer! I did, but I found out that the font is copyrighted so I cannot offer the file anymore. However, the font is called “The Skinny” on dafont.com and you can download them and make your own! I’m so sorry for the inconvenience. I’m still on the lookout for a similar font that I can offer as a download on the blog. 🙂
I tried doing this but my vinyl wouldn’t transfer. I even tried using a scraping tool. What am I doing wrong?
Hi Missy! What type of transfer tape are you using? I’ve found that some tapes are a little too sticky and don’t let go of the vinyl. For this project I used contact paper I bought at Target and it worked like a charm!
I have “The Skinny” font downloaded and was wondering how tall you made the words and did you bold it? I got a cricut for Christmas and want to go ahead and do some of these. Thanks a bunch!
Hi Gina! I offset the font (I think it was by 0.02) to make it a little more “bold” and easier to weed!
Thanks a bunch!
Hi!! Where is the bow tutorial?? I’m not seeing it …. Am I missing it somewhere??
Hi Jenn! I’m so sorry. I was updating the post and I accidentally deleted it. It’s back now. Thank you for brining it to my attention! 🙂
How did you get the font to be available on your Silhouette?? I’ve tried downloading it/importing it every which way and cannot figure it out?! I can use the font in “Pages” as a word Doc. but I can’t even open it to trace the words on my Silhouette let alone just type them to cut them out. I promise I’m not this technology challenged usually!
Hi Bailie! I use a Mac and as long as I import the font to my computer and then restart the Silhouette software I can use it!
If you haven’t restarted the Silhouette Studio I would try that first! If it still doesn’t work I’d contact Silhouette to see if they have any suggestions. I’m so sorry I can’t help further!
Would shatterproof ornaments work? Or does it have to be glass?
Shatterproof would definitely work!
Thanks for your valuable suggestions in the end! It will be really helpful