
Thanksgiving to Christmas Reversible Holiday Wood Sign


This post may contain affiliate links. If you purchase something through the link, I may receive a small commission at no extra charge to you.
Making a reversible holiday wood sign is so easy and fun! Plus, it saves space in your basement so you can buy even MORE holiday decorations. And if we’re being honest, isn’t that what’s really important?

Can we just do Christmas crafts all year long?
PRETTY PLEASE? ??
I think we can all agree that it’s just the best time of the year. People are happier, our homes are filled with joy and awesome decor, and the music is seriously the best. I’ve got Michael Bublé’s Christmas album on repeat and I am not sad about it at all.
Every year Chris gets on me about decorating and listening to music so early. You’d think 9 years later he’d be used to it by now. But….no. He still acts surprised year after year. And this year was no exception when I showed him my reversible holiday wood sign.
I may be permanently living with the Grinch. SEND HELP. And Christmas cookies. ?
This is the first year I’ve dipped into using power tools for my projects and I am OBSESSED.
I still love my quick and easy crafts to do during nap time but there is something so thrilling about using my nail gun and power saw to make things. I like to think that my dad is smiling down on me every time I pull them out. He was always working with his hands and loved to build things. I totally get that from him.
A few months ago I picked up the RYOBI nail gun at Home Depot because I wanted to start making my own picture frames. For one, it’s cheaper. And I am all about saving money on things! Especially on something that I’ll buy a lot of because we live in a house with empty walls that need things hung up on them. Two, it’s something I can talk about on the blog! Because this is a legit way to keep costs down when you’re trying to decorate, and who doesn’t love that?

I made my first frame a few months back but it honestly looked terrible. My measuring was weird and even with that the frame didn’t sit flush with the art. I hated it and it is currently sitting in my basement until I can figure out what to do with it.
This time I double and triple checked my measurements and I still messed up one of the sides and had to cut again! But, that wasn’t a huge deal because I can use that piece for something else eventually (silver lining!). I also made sure I sanded each piece of wood so that they were smooth before putting the stain on them. Something I didn’t do last time and I still regret.
Another thing I made sure to do was seal my art (and the frame once it was dry from the stain) before piecing everything together. It’s an extra step that’s really important if you’re putting your DIY outside but it’s still good to do even if it’s just hanging in your home. Plus, if little fingers get on it they’re easy to wipe off (not speaking from experience or anything ?).

This reversible holiday wood sign is:
- simple,
- colorful, and
- is cheap to make!

And because I think it’s kind of fun to see how much projects like this cost…I put together the list of materials I needed for it!
Cost of Materials:
- 12×18 Pine Board: $1.47
- 1x2x8 Pine Board: $1.24
- Thanksgiving Etsy File: $3.99
- Christmas Etsy File: $3.99
TOTAL: $10.69
Because all of the other things I used (Silhouette materials, paint, sealant, etc) are things I use for every project I do I didn’t include them. It would basically be adding pennies and that just seems silly to me. So the cost of materials is strictly the wood and etsy files. But also, keep in mind that my material cost is so low because all of the wood was part of bigger pieces that I’ve used for other things. If you’re going to Home Depot and buying big pieces of lumber to cut down your material cost will be much higher.

My favorite thing about the reversible holiday wood sign is that it takes up less space in storage. Maybe now I can hoard more Christmas decor without feeling too guilty about it. ?
Okay, let’s make a reversible holiday wood sign!

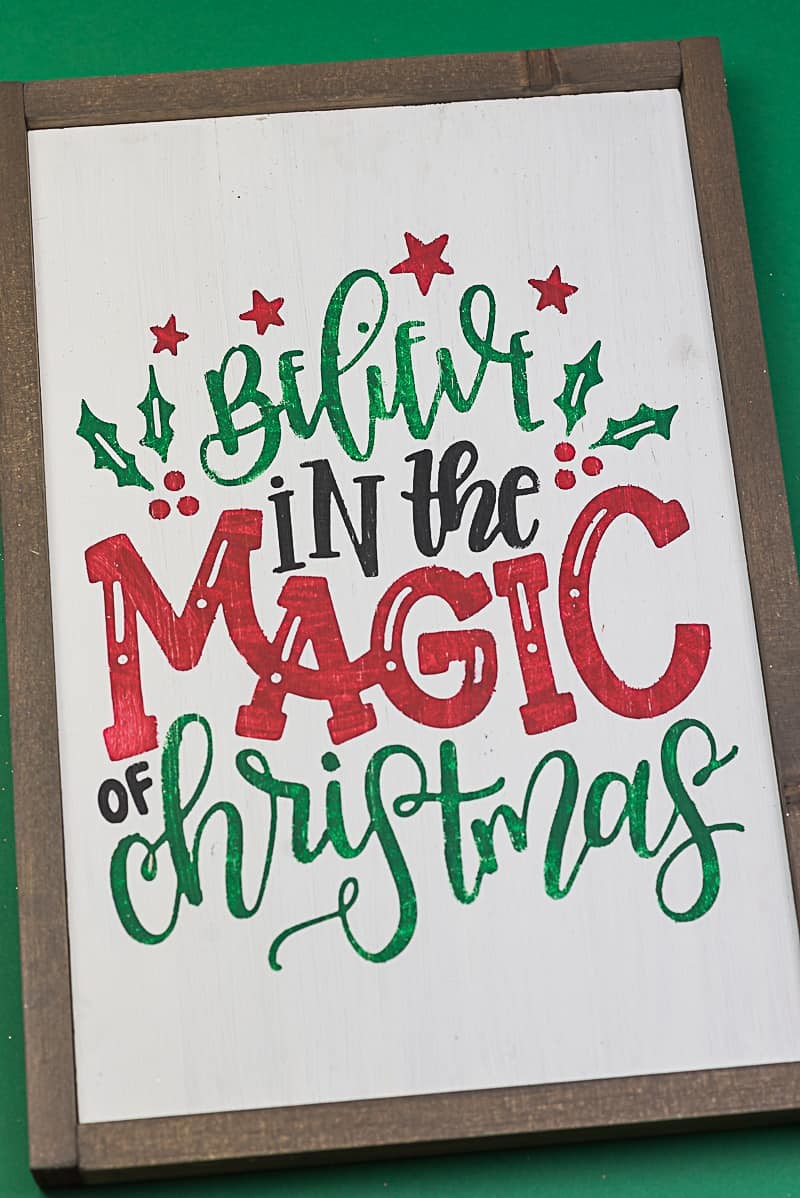
Reversible Holiday Wood Sign
Make a reversible holiday wood sign for less than $10!
Materials
- Stencil Vinyl
- Transfer Tape
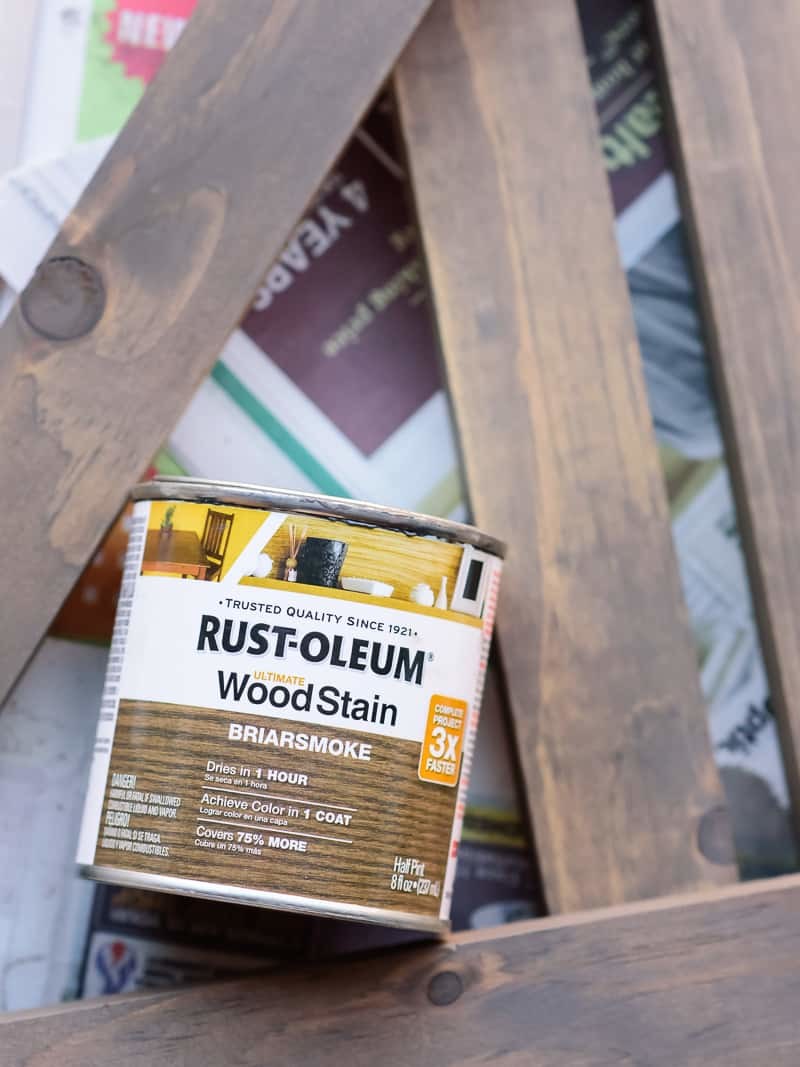
- Wood Stain - Briarsmoke
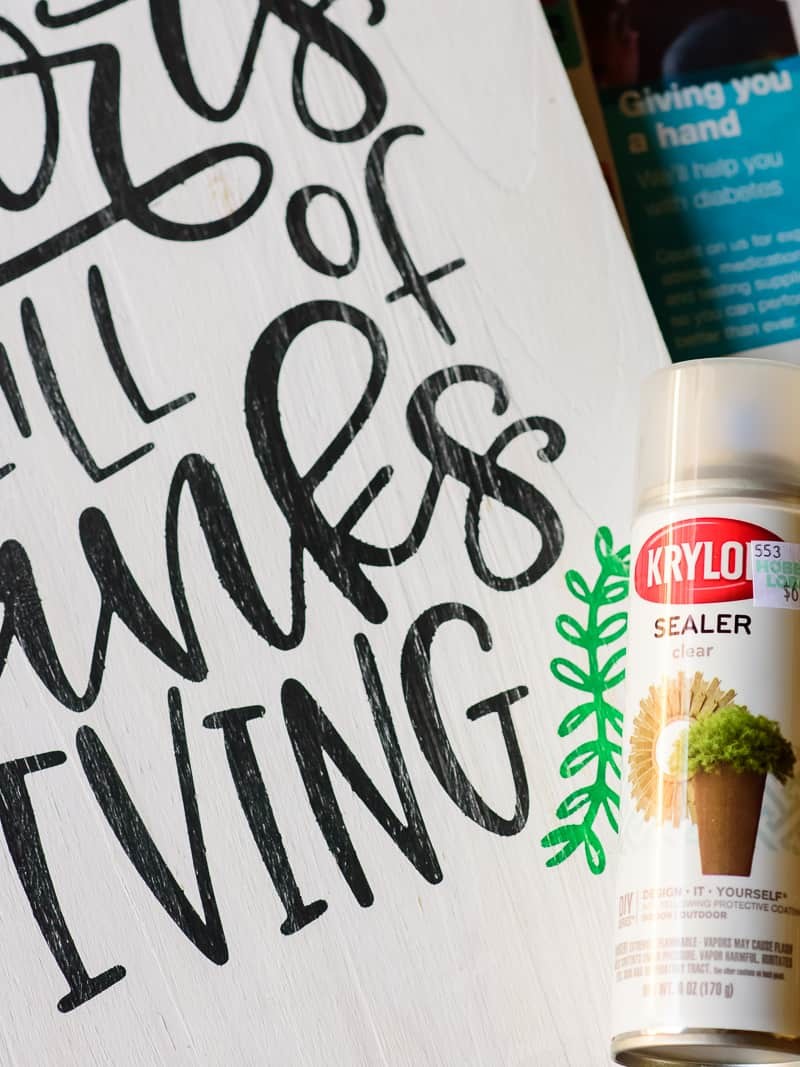
- Krylon Clear Sealer
- Acrylic Paint & Brushes
- Thanksgiving SVG File
- Christmas SVG File
Tools
Instructions
- Measure and cut your wood for the inside of the frame and the frame itself. Make sure you measure everything at least twice BEFORE you cut! (see NOTE #3 for frame and sign dimensions)
- Sand down all of your wood until it's smooth. Wipe it off with a dry cloth to get rid of all the debris.

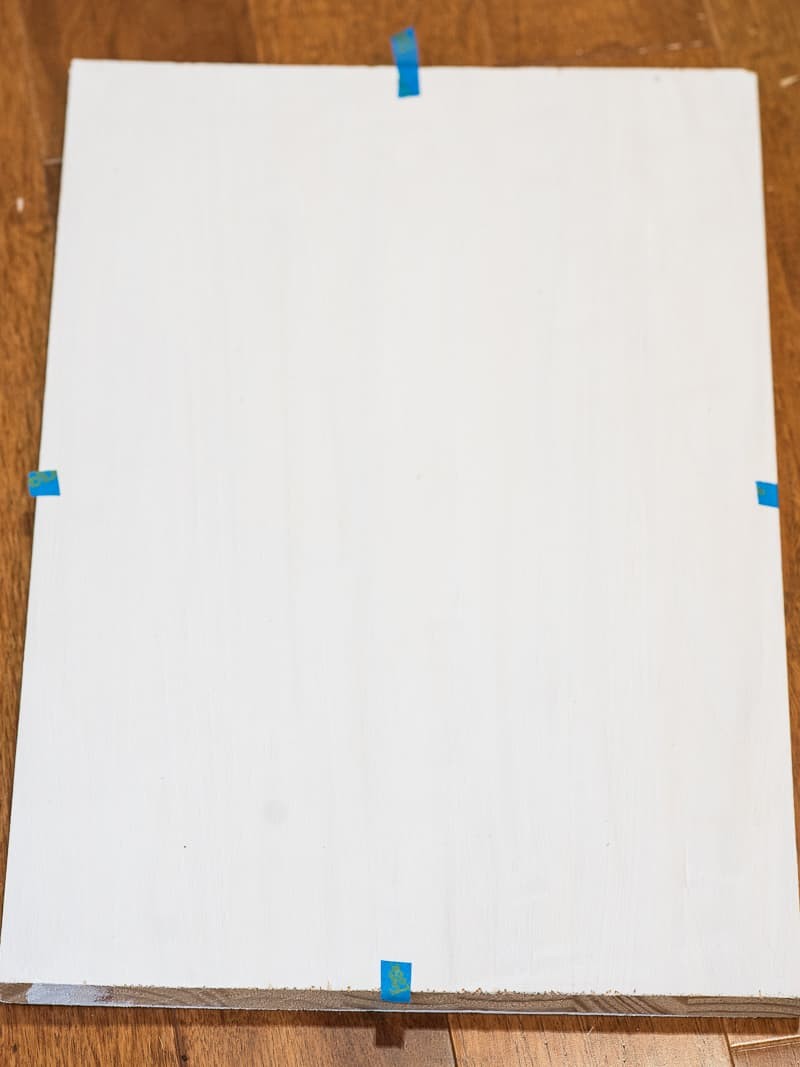
- Paint your bigger piece of wood (that you'll put your art on) and set it to the side. Make sure that you only turn it over to do the back side once the front is dry! I also like to put pieces of tape my board where the middle is on the top and sides, that way I can properly line up my design when I go to place it on the wood (see NOTE #2 for more information).
- Mix up your wood stain and stain each piece of your frame. Set them aside to dry.
- Pull out your Silhouette machine and cut out your designs.
- Weed your design and use transfer tape to put the design on your big piece of wood. Start painting!
- Peel up the stencil while the paint is still tacky. Let it dry all the way before you repeat STEP 6 on the back side of your wood.
- After it's dry you have the option of sanding down your artwork with a piece of sandpaper. I like to do this to give it a more rustic look. It's also good if you have a bit of bleeding with your paint because it can get rid of those mistakes!
- Seal your designs with Sealant and let it dry. Do the same with the pieces of wood for your frame.
- Once it's all dry use your staple gun to attach the frame to your art. (Follow the directions on your staple gun to get the correct pressure and depth for your nails.)

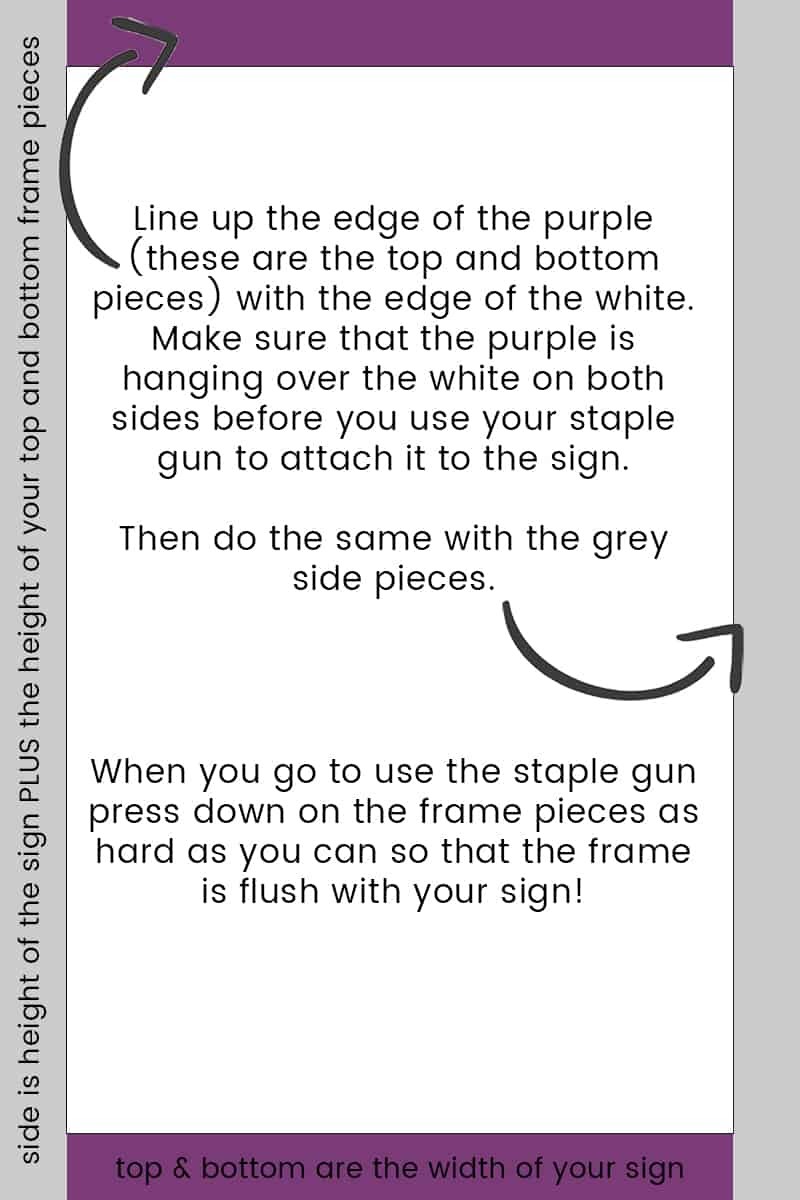
- I attached the top and bottom pieces of the frame first. Line them up with the edge of your sign and make sure that the frame hangs over your sign on each side. Then press down on the wood so that it is pressed against your sign and use your staple gun to staple everything together.
- Do the same with the side pieces of your frame.
- Find a place to hang it in your house!

Notes
- I am grossly overestimating the time it takes to do this DIY here! I didn't time myself but if you go slow with your measuring and cutting it could take a lot longer than an hour to get it done. The time of the DIY largely depends on how fast you are!
- I use a large ruler and painters tape to mark the center of my canvas. I also do this on top of the transfer tape when I put it on top of my weeded design. I use the tape to properly line up the design on my canvas (or wood) and it helps me get a straight and centered design every time! This is called the dry hinge method and it works amazingly well.
- My sign is 12x18 (and I believe 1/4in wide) and the frame pieces are 12 x 1/2in (top and bottom) and 19 x 1/2in (for the sides).
Recommended Products
As an Amazon Associate and member of other affiliate programs, I earn from qualifying purchases.


Love Christmas crafts as much as I do? These are a few of my favorites!
- Merry & Bright Christmas Sign (it’s reversible!),
- Hand Lettered Rudolph Craft, and
- Fresh Cut Christmas Tree Sign

more holiday crafts!
[pt_view id=”bf63466nhu”]
Hi! So how did you make it look distressed? How did you paint it on? Did you just paint it once on the stencil? I guess when I do this type of craft, I always go over it with several layers of paint. But I like the distressed look. Thanks!
Hi Sarah! I used a round foam brush and dabbed the paint onto the stencil. Depending on how it looks I’ll let the paint dry (I usually wait until it feels tacky to the touch) and then do a second layer if I want the design to be darker. That’s all personal preference! You might be able to tell on the pictures but the Christmas side of the sign is actually a little lighter in color because I only did one layer of paint. I would’ve preferred it to be darker personally, but it looks fine!
Once everything is dry I use a piece of sandpaper and go over the sign a handful of times until I’m happy with how it looks. I typically try to only go over the letters two or three times because if I do it more than that it’s “too rustic” and I’ve wiped away a majority of the paint. I don’t like the sign to look too faded!
I love how this turned out, it is so so cute! I also love that you can use it for multiple seasons, so perfect!
Thanks, Emily! I’m starting to love reversible signs. It means I can have even more holiday decor and I don’t have to worry about it taking over the basement. ?