
How to Use Heat Transfer Vinyl on Shirts


This post may contain affiliate links. If you purchase something through the link, I may receive a small commission at no extra charge to you.
Learn how to use your Silhouette Cameo to put heat transfer vinyl on t-shirts!
Making shirts with my Silhouette is probably my favorite thing to do.
Which, you probably know by now with how many I’ve made and shared here.
They’re so easy to make and they’re fun to show off too.
So really, they’re the perfect craft for anyone to do.
I’ve always struggled with the BIG 3 questions when it comes to placing the heat transfer vinyl on shirts.
- How big do I make the design?
- How far down from the collar do you place it?
- How do you make sure the vinyl design is straight?
I have multiple shirts where the designs were too low on me, crooked, or just so big that you can’t even read the text.
It’s a learning process to figure out where the best placement is and how big you need to make these designs.
But I want to take away those doubts and questions for you. I want to make this easy so you can make to your heart’s content and embarrass your kids or significant other with punny shirts.
What materials do you need to use heat transfer vinyl on t-shirts?
You will need….
What is heat transfer vinyl?
Heat transfer vinyl is a type of permanent vinyl that can only be applied with heat. Typically it’s used on things like shirts, pillowcases, blankets, etc. But you can also use it on wood and glass!
How do you use heat transfer vinyl?
Heat transfer vinyl comes with a carrier sheet on top (similar to transfer tape, but it can withstand high heat from a heat press, iron, or Cricut EasyPress). Whenever you cut heat transfer vinyl the carrier sheet (shiny side) will be facedown on your mat. You also have to mirror the design before you hit cut! Otherwise, your design will be backward when you go to place it on your shirt.
How do you apply heat transfer vinyl to your project material?
There are three ways you can apply heat transfer vinyl:
- Heat Press – this is the largest and most expensive (depending on what type you get) option to apply your vinyl. If you have a business or just do a lot of shirts I recommend looking into a heat press because it can do designs up to 15×15 and it’s very rare that you’ll ever need to make a design bigger than that. You also get even pressure with a heat press, and that’s really important!
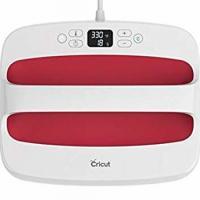
- Cricut EasyPress – this is similar to a heat press but it is smaller and easier to store if you are limited on space. I use an EasyPress and I love it, though I wish I had waited to get the bigger size (it came out a few months after I bought mine…of course!). Mine is a 9×9 so I have to press my designs multiple times to make sure I’ve heated all the vinyl. This sometimes causes uneven pressure on the vinyl which you can see if you look close enough.
- Iron – if shirts are not something you’ll make a lot of then a iron will be fine. However, depending on how big your design is you’ll be pressing it a lot to make sure you are heating every piece of the design. If you are heavy handed with your pressure one time and not the next, you’ll have uneven pressure points on your vinyl. If you look closely you’ll see lines in the vinyl design from that pressure. This isn’t that big of a deal if the shirt is for you, but if you’re making them for other people you don’t want those pressure points on your shirts. It can also cause your vinyl to come up off the shirt when you wash it.
FAQ’S
What is the best type of heat transfer vinyl for shirts?
Siser Easyweed – this is my favorite type of vinyl to use (especially for beginners!) because it is very easy to cut and weed!
Siser Easyweed Stretch – if you need a stretchy vinyl for your shirts, this is the vinyl you need! It works best for maternity shirts and bigger chested individuals. The adhesive on this type of vinyl is able to stretch without pulling the vinyl up off the t-shirt which makes it ideal to use on shirts that will be stretched when worn.
Siser Easyweed vinyl is really the perfect vinyl for all types of fabric projects which is why it is so popular with crafters. It can be applied at a low temperature and can be peeled hot or cold! It also is very durable in the washing machine and comes in loads of colors.
Stripflock Pro– this vinyl is not stretchy but it is nice and thick and weeds easily. It also is raised (it feels fuzzy when you run your hand over it) so it can give your projects a unique look.
Try practicing these tips with some of my favorite shirt designs!
- Tangled Disney T-Shirts for the Family,
- Peep Squad Easter T-Shirt (and a free file!), and
- Bleached Game of Thrones T-Shirt

How to Place Heat Transfer Vinyl on Shirts
Get professional looking heat transfer vinyl designs on your t-shirts with easy tips and tricks!
Materials
- Heat Transfer Vinyl
- T-Shirt (bought at Hobby Lobby)
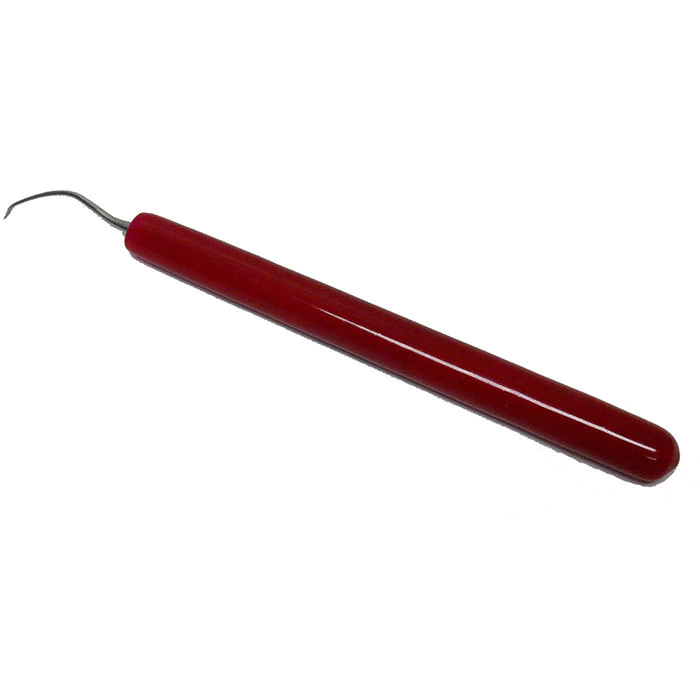
- Weeding Tool
- Teflon Sheet
- Stuck On You SVG
Tools
- Silhouette Cameo
- Cricut EasyPress
Instructions
- Load your heat transfer vinyl into your machine, shiny side down.
- Upload your design into your software then MIRROR IT and hit CUT. (see note #1)
- Unload the vinyl and weed your design.
- Heat up your Cricut EasyPress to the correct settings.
- Fold your t-shirt in half (length-wise) and press the crease with your Cricut EasyPress. (see note #2)
- Use a ruler to measure 3 inches down from the collar. This is where you'll place your design. (to get the correct number for your own shirt, refer to the placement guide!)
- Layer your heat transfer vinyl and teflon sheet on top of your shirt then place the heated Cricut EasyPress on top and "press" your vinyl design.
- Remove the teflon sheet and then try picking up the carrier sheet that is on top of your vinyl design. If any of your vinyl pulls up with the carrier sheet, put the carrier sheet and teflon sheet back down and repress with your Cricut EasyPress.
- Continue to do STEP 6 until you can peel up your carrier sheet without bringing the vinyl up with it.
- You can also turn your shirt over and press for an additional 15 seconds on the back. This is optional. (see note #3)
Notes
- ALWAYS make sure you mirror your design BEFORE you cut. Your design will be backwards (and I know it looks wrong, but go with it) but once you go to press it on your shirt it WILL be facing the right way.
- You can also fold your design in half (the non-sticky side of the carrier tape should be touching) to find the center of your design. DO NOT CREASE THE VINYL...just the top and bottom of the carrier piece. You can use the crease to line up your design with the center of your shirt.
- I have never noticed a difference in pressing the back of the shirt. However, Cricut does recommend this step for certain projects. Adding extra heat on the back will not hurt your design (make sure to still place the teflon sheet on top of the shirt before you press).
- IF YOU ARE DOING MULTIPLE LAYERS/COLORS: do not press for the full amount each time. The heat will cause your vinyl to shrink and your layers may not line up properly because of it. Press for 10 seconds (until the layer is pressed into the shirt) and then continue to do 10 second presses until all your layers are on the shirt. Then do one final 15-20 second press.
- Sign up for our email list to grab the SIZING AND PLACEMENT GUIDE to help you figure out where to correctly place your design on your shirts.
Recommended Products
As an Amazon Associate and member of other affiliate programs, I earn from qualifying purchases.


what printer can we use to print the vinyl?
The type of vinyl used in this project was not printed with a printer, it came from Expressions Vinyl! For printable vinyl I use the Canon PIXMA printer but you do not need it for this project.
I have a brand new heat press just sitting in my office that I got when I got my new maker.
I use a commercial Iron in its place
I iron alot of clothes works great on vinyl to
I not sure how to use the press when you have 2 or 3 pieces
Everyone always put one whole project in there like sublimation
I’m getting ready to start sublimation I have everything I need to put it together another thing I’m scared to start lol
Thank you Any ideas
How exciting that you’re going to start with sublimation! That’s something I haven’t tried yet.
To do more than one layer with a heat press, you press the first layer for 3-5 seconds. Pressing for too long means the bottom layer will shrink and cause gaps when you put the other layers on top of it. Continue doing that for each layer, and then do a final press of all the layers. Depending on the type of vinyl you used will determine how long you press for.
Good luck with sublimation! It’s always scary to try something new but I’ve learned that if you start small and get used to the new materials you’re using it’ll help you build up your confidence!
I purchased heat transfer on Amazon but having trouble with my heat press because the vinyl comes up with the transfer so I press longer than comes out wrinkles I must be pressing to long idk. Please help with what to do I have alot to press for my non profit organization
What type of vinyl did you purchase? And did it come with heat press instructions/suggestions? And what type of heat press are you using?
It’s hard to tell you exactly what’s going on without knowing what supplies you’re using but…
If the vinyl is coming up after using your press you may not have enough pressure on the vinyl. Check the pressure first. Then check to see if your vinyl is hot or cold peel (this is important!). If it’s cold peel you need to wait before you try to remove the carrier sheet.
Always press for 10 seconds at a time after your initial press. Pressing too long is what causes the wrinkles!