
Take Great Photos at Disney
This post may contain affiliate links. If you purchase something through the link, I may receive a small commission at no extra charge to you.
Happy Valentine’s Day! I hope everyone is feeling extra loved and extra special today.
So, this Let’s Talk Disney post is going to be a little bit different from the rest. Instead of talking about things to do at the parks or Fastpasses, I’m going to talk about Disney photos. And not the professional photos a Cast Member can take of you. We’re going to talk about how I’ve been able to get great quality pictures on my DSLR (in manual mode) while at the parks. A few tips and tricks I’ve found, some books I recommend, and a bit of sheer dumb luck have all contributed to some awesome and not-so-awesome Disney photos. Let’s get started, shall we?
Let’s take a look at some of the very first pictures I took with my camera back in November of 2013:

I only had my camera for about a week when I took it to Disneyland. I thought that since I had a limited knowledge of photography, that reading the manual would be fine and I wouldn’t need any other help. I was wrong. You can never know too much! A DSLR is very different from a point and shoot, and if you want to shoot solely in Manual Mode you’re going to have to do your homework to get that perfect shot you’ve been dreaming of.
Here are the three key exposure settings every camera owner should know off the top of their head:
- f/stop (aperture): The f/stop number determines how much light to let in your lens. The larger the f/stop number, the smaller the lens opening to let light in. The smaller the f/stop number, the larger the lens opening to let light in. Larger f/stop numbers are great for brightly lit days and smaller f/stop numbers are best for cloudy days, dusk, or evenings.
- shutter speed: This determines how fast your camera will take a picture. Fast shutter speeds tend to freeze motion while slower speeds tend to blur motion.
- ISO: the level of your camera’s sensitivity to available light. My Nikon has ISO settings from 100-6400. The lower settings are used for brightly lit days because the lower the ISO number, the less sensitive the camera is to light. The higher settings are used for long exposure shots (or nighttime shots), because the higher ISO number increases the camera’s sensitivity to light. You have to be careful though. If you use too high of an ISO number in low light situations, your pictures will turn out grainy. Not a good look!
I will admit, that I still get a little confused on how to set up my f/stop number and shutter speeds. There is a lot of trial and error on my part, but the more I fail the more I learn. And Chris has been such a great help when it comes to remembering camera settings. He very calmly will mention changing a setting when he sees me getting frustrated, and once I do what he says I usually get the picture I had been looking for all along.
For our Thanksgiving trip, I bought a book specifically for my Nikon d3200 to read up on. It was a very basic book that, if you know nothing about photography, I highly recommend it. He goes over the basics in a lot of detail and makes everything very easy to understand. I like to describe this book as an in-depth look at your camera’s owner manual.
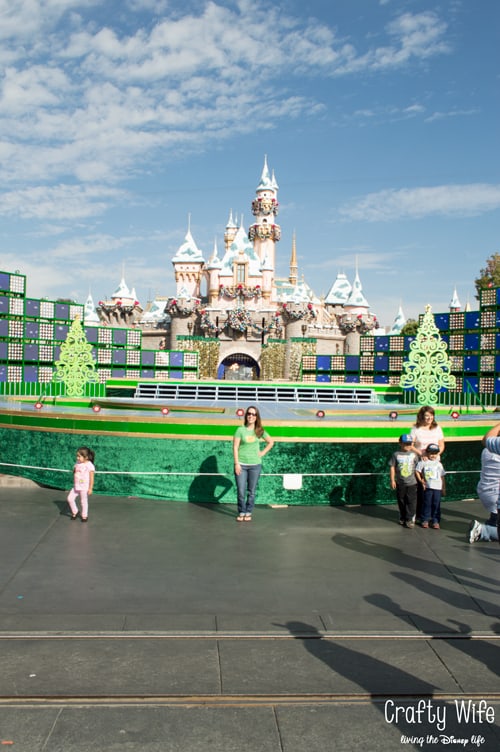
Here are some of the pictures I took on our second trip to Disney over Thanksgiving 2013 (with advice from the above book):

Lens: AF-S Nikkor 18-55mm (came with Camera)
f/stop: 11
Shutter Speed: 1/250
ISO: 100
Lens: AF-S Nikkor 55-200mm
f/stop: 11
Shutter Speed: 1/250
ISO: 100
After our Thanksgiving trip I decided that I really need to read up on my camera and learn how to take different exposure shots. If I wanted to get great pictures, I needed to put in the effort. So I decided to buy a second book, Understanding Exposure by Bryan Peterson, to see what I could learn from him. I absolutely love this book! There is so much detail, tips and tricks, and pictures in it and he makes learning fun and exciting. I’m a visual learner so I loved the fact that he would tell me how to take a specific shot, and then have pictures at the end of the chapter to give me an example of what he was talking about. He also included the settings he’d use on his camera (as well as the lens) so you could try the exact same picture on your own.
Here are some of the pictures I took in January with his help:

Lens: AF-S Nikkor 18-55mm (came with Camera)
f/stop: 8
shutter speed: 2
ISO: 800
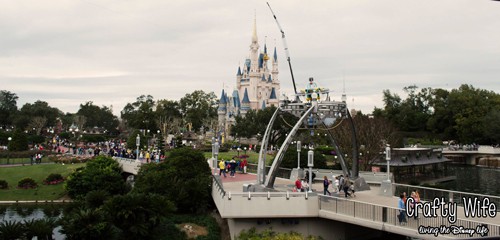
Lens: AF-S Nikkor 18-55mm (came with Camera)
f/stop: 8
shutter speed: 1/160
ISO: 200
Looking at these pictures, I can definitely see improvement from last November until now. Here are a few tried and true tips I’ve learned from my books that will get you on your way to taking great professional photos:
- Use the sky to find out what exposure you should be using. Something I learned from Understanding Exposure was to always point my camera up to the sky to set the exposure (just don’t point your lens directly at the sun!). It’s a tried and true method that has yet to fail me. You may have to adjust slightly when focusing on your subject, but not much.
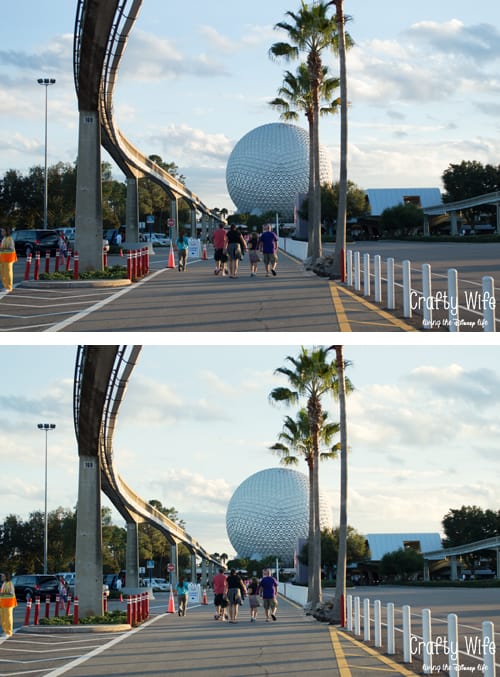
- I like to take three photos of the same subject to make sure I get the perfect exposure. The first one will be slightly underexposed, the second will be (what the camera says) the perfect exposure, and the third is slightly overexposed. To my surprise, I almost always like the overexposed one the best.
- I never use my built-in flash. Ever. During the day, you won’t need it and at night it’s no use to you unless you want to wash out everything in the background.
- Motion pictures are the hardest to get (at least for me). This last trip was my first time ever being able to get it right. I still keep my camera in Manual Mode while taking these shots and turn my shutter speed up fairly high (about 1/500). It’s all about trial and error!
- For fireworks shots, you’ll definitely need a tripod. You’ll also have to play around with the settings a bit, because fireworks can let a lot of light into your camera. Below are two examples of what you want to do, and what you shouldn’t do:

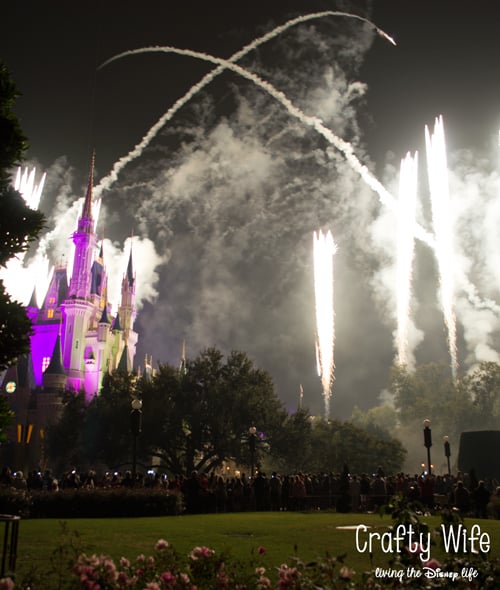
Lens: AF-S Nikkor 18-55mm (came with Camera)
f/stop: 3.5
shutter speed: 1/3
ISO: 200
Are there any tips I left out that you think should be included in this post? Or is there anything I should expand on? Let me know!
Great post, Teresa! It just reminds me that I have so much to learn. Thanks for sharing the books you’d recommend. Your photos definitely capture the magic of Disneyland.
Thank you, Carrie! I still have a long way to go when it comes to learning how to take specific shots but I feel pretty good about the ones I have taken so far! I hope that you find some of the information helpful. 🙂
Beautiful photos. The caraousel with the castle behind it is gorgeous! We went to Disney last June, but I only took my iPhone. Didn’t want to carry my camera around all day. Next time though!
Thanks for linking up to our Twirl and Take a Bow Party. Hope to see you again this Tuesday!
Thank you, Trina! The carousel photo is my absolute favorite! I was actually not looking forward to carrying around my camera equipment either but the backpack I have for it is amazing! It distributes the weight perfectly so I honestly don’t feel like I’m carrying a heavy load around all day. 🙂
Thank you for stopping by!
Photographing fire works has to be tricky. I have found that any moving target is a candidate for a blurry picture. I’ve got the blurs to prove it.
I do too. 🙂 Moving pictures definitely take a lot of practice! Thank you for stopping by!
Agreed, great post!! I can definitely see an improvement in the pictures that you have taken. My favorite is the carousel with the castle in the background and I can’t even imagine trying to shoot fireworks or a rocket launch. Those seem like the hardest shots to take.
The f/stop has become my best friend. I find that the lower the f/stop is the background becomes blurrier and only the targeted area is in focus. I like the blurred background so I tend to drop that number really low but that gets me in trouble a lot because if there is a group shot only one person from the group will be in focus. I also really like the 50mm lens, it is my go-to lens lately, but the biggest down side is that there is no zooming in or out so the photographer has to move. This lens does not work if there is a group shot involved unless you want to stand across the road. I really have a love/hate relationship with it but it is still my favorite.
Thank you, Jen! The carousel is my favorite picture too. I think I need to blow it up and put it on a canvas. 🙂 And I swear, I think I just got really lucky with the rocket launch pictures. I had no idea what I was doing! haha
I love all of your tips! And, your photos are always amazing. I really want a wide angle lens next and have been talking to Chris about looking into it. But, I want one with a low f/stop so I can blur the backgrounds because those are my favorite types of pictures too. Actually, I really want a ton of different lenses but Chris either needs a huge bonus at work or we need to win the lottery. I’m okay with either. haha
Okay…I’m going to go look at some of your pictures again. Not only do you have the cutest subject in the world, but your photos are amazing.
Oh Teresa I am so glad to have fond you and I am beyond excited for the Photography Challenge. I have been doing a lot of online research as well as grilling my photographer brother in law but there is nothing like getting your hands in it and doing it. I have a Nikon D5300 with the same lens as you (I think). I’ve been playing with my settings and such and I know learning with goals will help me a lot.