
How to Photograph Christmas Trees
This post may contain affiliate links. If you purchase something through the link, I may receive a small commission at no extra charge to you.
11/29/14: This post has gone crazy on Pinterest this year, and I am so happy to have you all stop by to find out how to take great pictures of your trees this holiday season! I’ve noticed that some of the information I originally posted is no longer available online and I want to bring you the most accurate and up-to-date information as possible, so I’m updating this post. Thank you for stopping by! Merry Christmas and Happy Holidays.
![]()
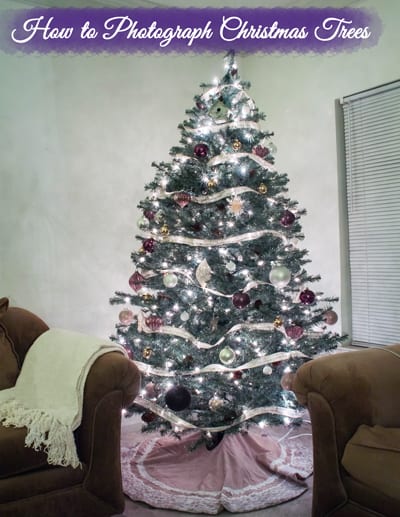
I love taking pictures of my Christmas tree. It’s up for such a short while and I like being able to revisit pictures of it from time to time throughout the year. My husband bought me my very first DSLR for my birthday last year, and I was anxious to start using it to capture anything and everything. And once we put up our Christmas tree I really wanted to try my hand at taking beautiful pictures of it. But, I didn’t know how. I didn’t want to use Auto Mode because the flash would make the picture look horrible. I knew that the only way to take a great picture was to use Manual Mode, and I hadn’t learned anything about that yet! So, I went on an internet search to see what advice other people had for beginners like me, and I found some pretty awesome information!
These tips are all my favorites from around the world of Pinterest. The general consensus is that you need a wide lens (like a 50mm) with a high aperture (anywhere between 1.4 and 2.8 should do the trick), a tripod, and patience. If you don’t have a 50mm lens or even a lens with a low aperture of 1.4 or 2.8, don’t worry! I didn’t have that last year and my photos came out great! I was very happy with them. So my advice to you is to work with what you have. When you finally get that perfect money shot it’ll all be worth it.


Must-Get Christmas Pictures from Kevin & Amanda | Take Great Pictures of Your Christmas Tree from Backdrop Express | Photograph Christmas Lights from Jordan Brantley |
Christmas Tree Lights from CM Blog


Perfect Christmas Tree Photo from Trains and Tutus | Christmas Tree Lights from Click It Up a Notch | Christmas Tree Photo Tutorial from The Crafty Woman | Christmas Tree Photo Tips from Lil Blue Boo
Last year I used my kit lens (18-55mm) and I loved the way my pictures came out! All the advice on Pinterest really helped me capture the beauty that was our tree. And since my husband got me a tripod after Christmas last year, I had to improvise and use a lamp to hold my camera instead. I will warn you that I didn’t think it was the most sturdy thing to hold the camera up so I was always right beside it just in case, but it did do the trick!

Do you have any tips for taking great photos of your Christmas tree? Let me know in the comments below!
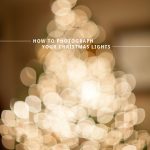
I love your tip about using a lamp as a make-shift tripod! The last image on this page (Rachel Brenke) doesn’t make sense and actually contradicts some of the information in the other links. The F-stop should be set at its lowest setting (largest aperture) in order to achieve bokeh with the Christmas lights. Otherwise, the high aperture setting creates a deep depth of field and would make the tree in focus (nearly) regardless of focal point. The shutter speed has no impact on how big the blur is for each Christmas light. The study of optics tells us that the reason we get bokeh (blur) is because of the quantity of light beams heading in through the aperture, not the length of the exposure (duration). Why would she list a “wide aperture lens” if she’s using the smallest aperture (f/16)? I do not intend to be sassy or all “sciency” on your blog and apologize if that’s how it sounds. I mean no disrespect but just hope to give some consistency – this image is flying around pinterest right now! I really enjoy your blog – the Holiday Gift ideas for this year are super! I especially love the stocking stuffer ideas.
Jenny, this is awesome! Thank you so much for the insight! I put this together last year after owning my camera for only a month, so I didn’t even know that last bit of advice I posted wasn’t accurate. But you’re right, the lower the f/stop the shallower the depth of field and that is the only way you’ll get those coveted bokeh shots. And, you are in no way sounding sassy and I appreciate the “sciency” aspect of your comment. I’m off to fix this right now!
Thank you so much for stopping by and taking the time to correct the mistake I made. I never want to give out inaccurate information and I’m so glad you brought it to my attention. I hope you have a great weekend, and thanks again!
I so need this because I need to photograph my Christmas tree for a blog post! Excited to try out these tips!!
I can’t wait to hear how it goes for you! I need to try to photograph our tree again. haha
I wish I had a nice camera that I could make all of these adjustments with. Instead I will make do with my phone/iPad and try to take some of these angles.
found this on the Wednesday Roundup
I hope you’re successful with your phone and iPad! The best camera is always the one you have on you, all you have to do is keep trying to find out what works for you! Good luck!