
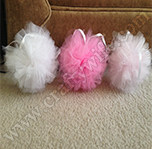
DIY Tulle Balls
One of my favorite decor items we made for the shower were tulle balls. The great thing about this decoration was that we could make them in any size and color. It took some trial and error to get them right and a few of us got a little frustrated when the tulle balls weren’t coming out like we planned. I also found out that there aren’t a lot of tutorials on Pinterest that could tell us how to make them.
I did find one tutorial (which I cannot locate at the moment) that helped me get started. The supplies I used were:
- Two large cardboard boxes
- A few different sized glass bowls (I used my Pyrex)
- A pen
- Exacto Knife
- Tulle (how much depends on how many balls you’d want to make. I had 3 rolls of 25 yards (most used for a tutu), and 11 more yards of different colors.
- I bought animal print fabric (on a major discount!) and cut them into one inch strips.
- Rope or ribbon (I used both)
The first thing I did was cut the animal print fabric into one inch strips.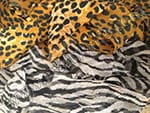
I traced circles on the cardboard and cut them out. I also cut out a smaller circle in the middle of the bigger one. 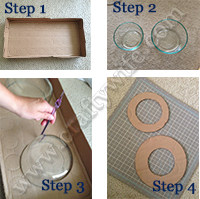
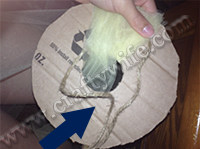
I wrapped ribbon around the outside of the large circle and tied it in a knot. Once I started wrapping the tulle (loosely) around the circle I made sure to move the ribbon towards the middle (smaller circle). This is also when I added the animal print fabric into the mix. I tied as many as six pieces that were evenly placed around the circle (unfortunately I do not have a picture of this step).
Place your scissors underneath the tulle and begin to cut. Cut along the outer circle, taking care to not cut the ribbon. Untie the first knot you made before you started wrapping the tulle. Then tie an extremely tight knot around the middle of the tulle. Pull the tulle through the smaller circle. Then pull the tulle apart to get a fuller ball.
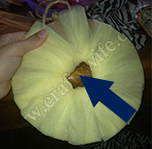
You may have to cut parts of the tulle to even out the balls, but don’t cut too much or you won’t have any tulle to work with!
There were a few things I learned while making these:
- Tulle can get expensive fast if you’re not sure how to make these and you go through a lot of trial and error.
- Accidentally cutting the rope or string is a major pain. You can fix it by laying the tulle strips on top of each other, tie a ribbon around the middle, and fluff it out.
- After a bit of trial and error I found that it was much easier to make fluffy, large tulle balls with tulle that was cut at the fabric store. That’s probably because they have larger rolls of tulle that means the fabric is wider than it is long, but it is also more expensive.
We had a lot of fun making these for the shower and (as far as we know) everyone loved them! There was also a suggestion that after the shower my sister could use the tulle balls and turn them into a mobile for the nursery.
So what do you guys think? Are you a fan of the tulle balls or do you have a cheaper/more cost-effective version that’s more your style?