DIY Necklace Onesie
My favorite part about the baby shower (besides crafting for it!) was making my niece clothes. I loved looking up ideas on Pinterest and imagining a mini-me of my sister in them. What can I say, I have a lot of time to daydream. And my favorite outfit had to be the necklace onesie.
This onesie was (on a scale of easy to super hard) was easy/medium. The first time I tried this I added too much water and the onesie came out more purple than grey. I also forgot to put cardboard inside the onesie so when I painted the necklace the paint leaked through. Luckily, I found out that you can semi-easily remove acrylic paint from clothes so I will be doing that at some point.
I got the idea for the onesie from this blog post and found great tips on how to dye fabric from this post. Once I was armed with all the information I was ready to get started (for the second time).
Make sure you follow the directions on the inside of your dye box exactly! I used a bucket instead of the sink to put the hot dye in and lined the bucket with a plastic trash bag, which made it easier to clean! I also added twice the amount of water and only left the onesie in the dye water for about ten minutes because I wanted to end up with a charcoal grey color, instead of black.
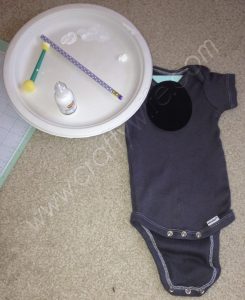
What You’ll Need:
- Onesie – I used a 0-3 month
- Rit-dye in whatever color you want – I used black
- White acrylic paint
- A pencil with an unused eraser
- A rounded sponge – I used the smaller side
- Cardboard to stop the paint from leaking through the fabric
- Large oval cutout to use to paint the necklace
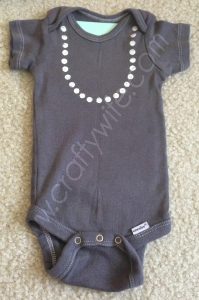
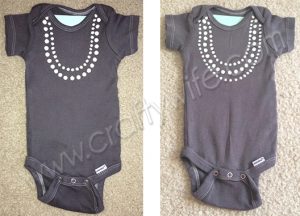
I used the large oval cutout to get the perfect arch for the necklace and I used the rounded sponge for the circles. I had to go over the circles three times to make sure there was a nice layer of paint on the onesie. Then I let the strand dry for a few hours (I was being extra cautious, you’d be fine after an hour) before starting on the second strand.
Follow the same instructions above for the second and third strands.
I wasn’t able to take pictures while I was making the fabric flower since I was the only one home at the time. However, I found a great link a few days ago on Pinterest that gives you so many options for fabric flowers! The one I made is called the Rosette Flower (just a tighter version). It was really easy, after I burned my fingers a few times!
I attached the flower by hand sewing it into position. You could also use a safety pin in case you didn’t want to use it for a day, but I thought that if it came undone it would make for a pretty unhappy child. To me, sewing was the best option.
The onesie was a huge hit at the baby shower. Someone even said they would wear an adult version if they were available (future shop idea?). I love that there are so many options for this outfit and it’s completely customizable. You can do pretty much whatever you want and it will still come out looking great!
I linked up to:


This onesie is so stinkin’ cute! I love the gray and yellow combo. I’m sure your niece will look fabulous in it!
Katie @thecasualcraftlete.com
Thank you, Katie! My sister sent me a picture of my niece in it (3 weeks old and wearing 3 month clothing! haha) and she is absolutely adorable. 🙂