
How to Make a Hand Painted Doormat Tutorial
Use your Silhouette machine to cut out a stencil to make a hand painted doormat!

I honestly hate shopping in a store. Now that there’s grocery pick-up and online shopping it’s very rare that I actually have to go in to a store and deal with people.
I hate dealing with rushed shoppers if I don’t have to.
It also means that if I’m not running to the store than I can stay home and have more time to craft or clean.
It’s a little crazy to think that when I was younger online shopping wasn’t really a thing. At least, not until I was a teenager. My mom used to drag us to store after store buying groceries, clothes, and whatever else we needed. Which really wasn’t a huge deal until you had to stand in a long check-out line at the local Walmart. What’s more boring to a 7 year old than a check-out line?
NOTHING.
So I’m grateful that we have things like Amazon Prime and Target pick-up in case I don’t want to get out of my pajamas and run to the store. Because, it happens more often than I care to admit.
I like my pajamas y’all, don’t get between me and my comfort clothes.
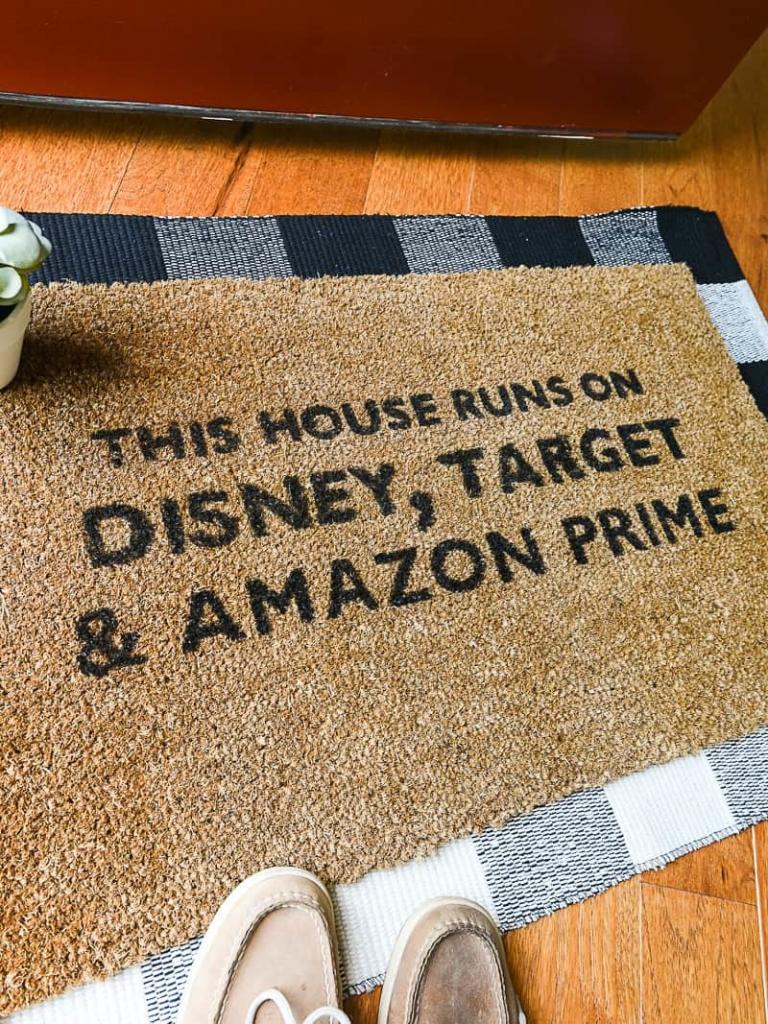
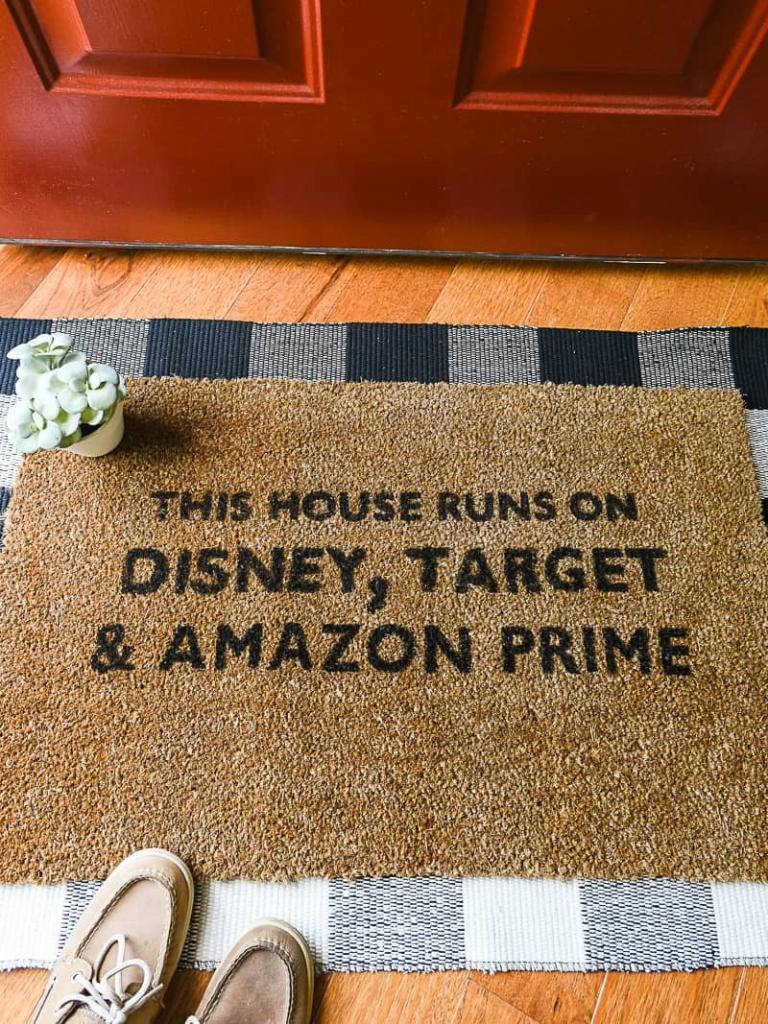
If I’m being honest, my world consists of Target runs, browsing Amazon Prime for things I don’t really need and relaxing Disney vacations.
This post contains affiliate links. I may earn commission from qualifying purchases at no additional cost to you. I will never recommend a product I don’t use or trust.
Want to know more about this hand painted doormat tutorial? Read on for commonly asked questions.
How do you get the stencil to stick to the doormat?
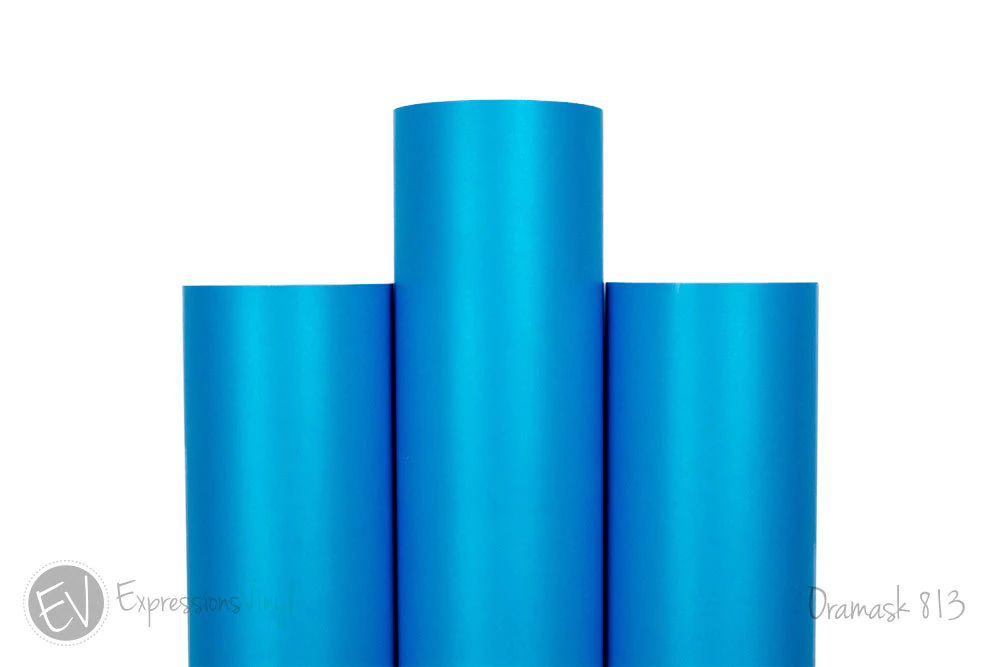
If you’re using Oramask 813 stencil vinyl you need to really press the stencil onto the mat. This stencil vinyl is my favorite to use and it is very sticky so it works well on the doormat!
You can also use freezer paper for a stencil. But if you do you’ll need an iron to adhere the freezer paper to the mat.
Should you use freezer paper or stencil vinyl?
I personally really like Oramask 813 stencil vinyl for any stencil projects. But I do realize that freezer paper is more cost effective and if you’re looking for a cheaper option that might be better for you. Both work, it just depends on what you want to use.
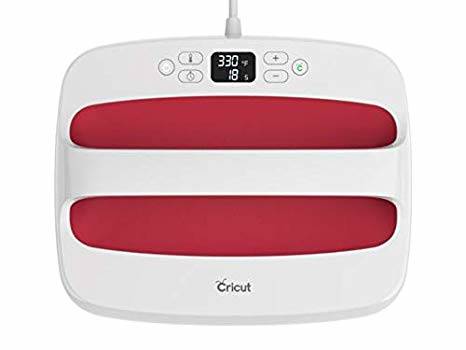
If you decide to use freezer paper make sure you cut with the shiny side up and that your mirror your design. When you place your freezer paper stencil on the mat you will need to use an iron (or your Cricut EasyPress) to heat the stencil so that it’ll adhere to your mat.

What lasts longer on a mat, Flex Seal or outdoor paint?
I have not used flex seal on my mats before but I’ve heard this is the best option to use on your mats. You can buy Flex Seal at any home improvement store or online!
My mat is exposed to the elements all year long because we do not have a front porch so the outdoor paint faded in about 3 months. If you have a front porch and your mat is protected it’ll last longer. But outdoor paint does fade fast!
Should you protect your mat with sealant?
Yes! I did with my mat and I think it did help my mat to not fade as quickly. Definitely protecting anything that you put outdoors is a must!
And while the mat itself was pretty easy to paint, I still have a few ideas on how to make this even easier for anyone wanting to attempt to make their own.
My favorite must-use tips are:
- Use a bold typeface for your stencil. Those skinny fonts may look pretty but it’s much easier to paint if you have a really bold font on your DIY doormat.
- For a cheap (and easy!) way to cut a stencil, use freezer paper from the grocery store.
- Grab a tiny paintbrush so that you can go over the letters after the initial layer of paint dries. A tiny brush helps you get into all the small crevices, which helps make your letters look bold and more defined.
- DO NOT USE transfer tape to put your stencil on the mat. Placing Oramask 813 on the mat is very forgiving so you can just pick up the pieces and lay them yourself. I used transfer tape and think that’s what made placing the vinyl such a headache.
Flex Seal Spray is what crafters in the Silhouette Groups I’m in swear by, especially those who sell these mats in their stores.
WARNING: these mats have a very short shelf life, usually around 6 months before they fade. Sealing your design will help keep the design from fading as quickly, but they will still fade.

This project may seem a bit intimidating at first (hello, it took me a year to finally make!) but it really is easy. The hardest part was trying to place the stencil on the mat, though that was mostly due to using transfer tape. Once you get the hang of it you’ll want to make a new mat for every season!
Which, I may or may not do. ?
This DIY doormat is
- cheap,
- easy, and
- perfect for beginners!

Hand Painted Doormat Tutorial
Materials
- Coir Doormat (I got mine from Target for $9.99)
- Americana Decor Outdoor Paint, black
- Sponge Brush or Stencil Brush
- Oramask 813 Stencil Vinyl
- Freezer Paper (only if you don't want to use stencil vinyl)
- Flex Seal Spray (highly recommended to keep your mats looking great for longer periods of time)
- AMAZON PRIME Cut File
Tools
- Silhouette Cameo
- Cricut EasyPress
Instructions
- Cut out your design with your cutting machine (OR you could cut it out with an exacto knife if you don't own a cutting machine!).
- Lay your design down on your mat. If you're using stencil vinyl, press it into the mat and secure the edges with painters tape to keep it from moving around on you.
- If you're using freezer paper grab an iron and turn it on to the cotton setting. Then iron the freezer paper down on the mat (even though it's stuck to the mat you will be able to easily pull it up once you're down painting!
- Using your outdoor paint and brush, use a dabbing motion to paint along the stencil. Using the dabbing technique will stop your paint from bleeding through the stencil. Do two layers!
- Once the layers are dry take a smaller brush (this step is optional) and go over your design again. This will help you get paint in all the little spaces you may have missed with a bigger brush.
- After all the layers are dry you should seal your mat. This is especially important if your mat is going to be exposed to weather. (use polycrylic if you are going to seal your mat!)
Recommended Products
As an Amazon Associate and member of other affiliate programs, I earn from qualifying purchases.

Hi! This is adorable. Did you have to place all of the “insides” of the letters (such as the inside of the O, the D, the R) by hand? I’ve tried using freezer paper and it is SUCH a pain and so time consuming to iron on all of the little letter “insides” (do those have a name…?). Just wondering if there’s a better way 🙂 Thank you!
Hi Megan! Thank you! Unfortunately I’ve never found a better way because when I tried transfer tape I couldn’t get the inside of the letters off the tape! It was a pain. I would suggest using stencil vinyl because it’s so much easier to attach the inside of the letters to the doormat! And they’re easier to move in case you need to fix them after you lay them on the mat.
Good luck! If I ever find a better way I’ll be sure to let you know! 🙂
Hi! Did you use the flex seal on your mat? And how did you apply it, if you did?
Thanks! Cindy
Hi Cindy! I have not tried flex seal with my mats, for this one I used outdoor paint. 🙂
Hi there! When you sealed your mat with Rustoleum, which exact spray did you use? I want to be sure I get the correct spray. Also, did you spray just the letters (with the stencil still in place) or did you pull the stencil off and spray the whole mat?
Any update on how yours is holding up in the elements?
Hi Katrina! I used the Krylon Clear Polyurethane spray and made sure it was for outdoors. I did spray the whole mat as well, just to make sure I had lots of extra coverage.
My mat held up pretty well for about 3 months. But we do not have a front porch and the mat was always exposed to the elements (snow, rain, etc) and it started to fade after a while. I’ve heard Flex seal is better to use if you’re worried about fading and such and I’m planning to try it for my next mat! However, I don’t think they have colored flex seal so if you’re looking to do something colorful you’ll need outdoor paints instead.
Hi There!
just wondering if you have any ideas of how to get paint off of a coir mat? I accidentally dropped some paint where it doesnt belong!
Hi! I have never been able to get paint off of a coir mat unfortunately. The best thing I’ve done is to make a little design with the dropped paint that goes with the design on the mat.