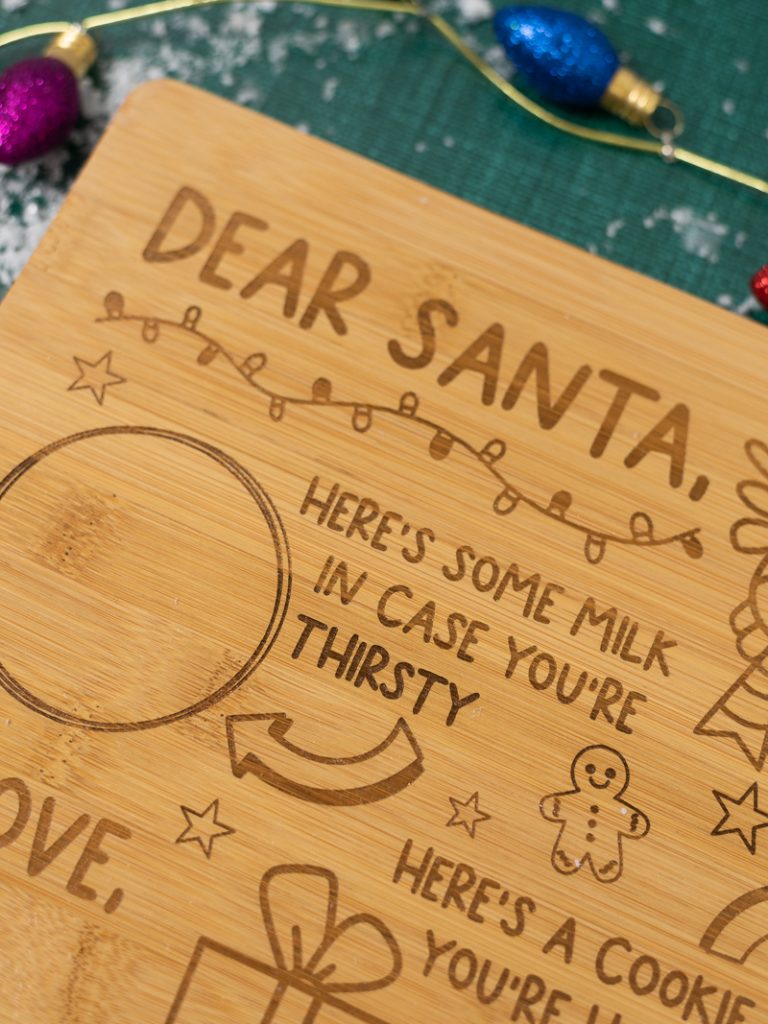
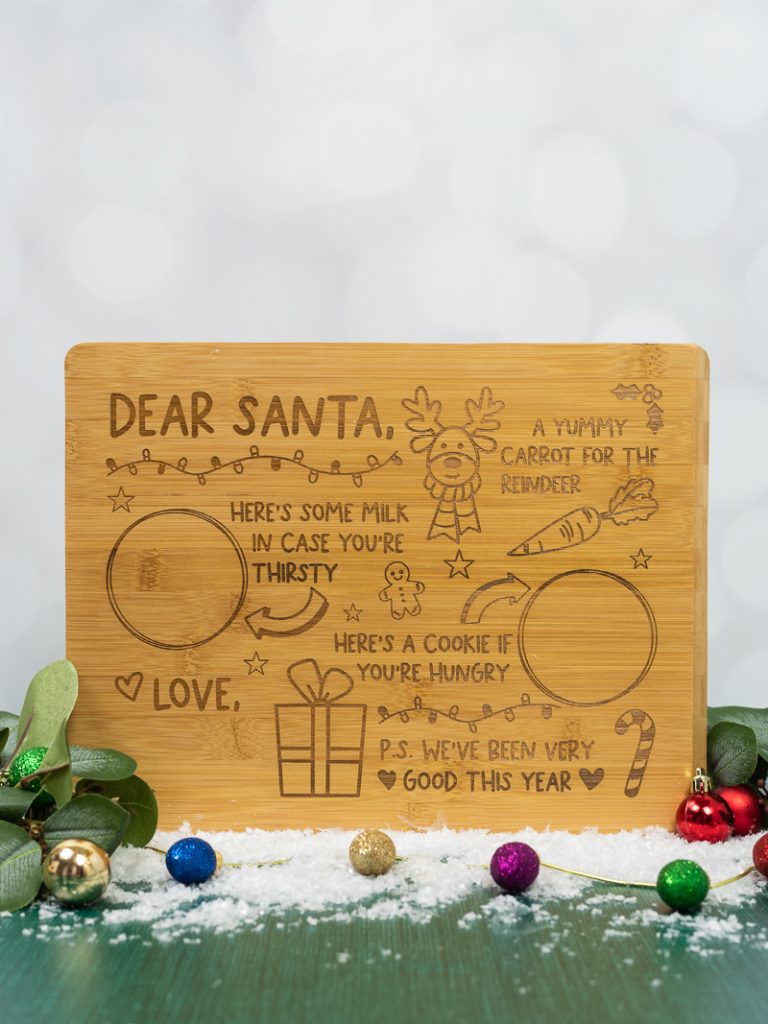
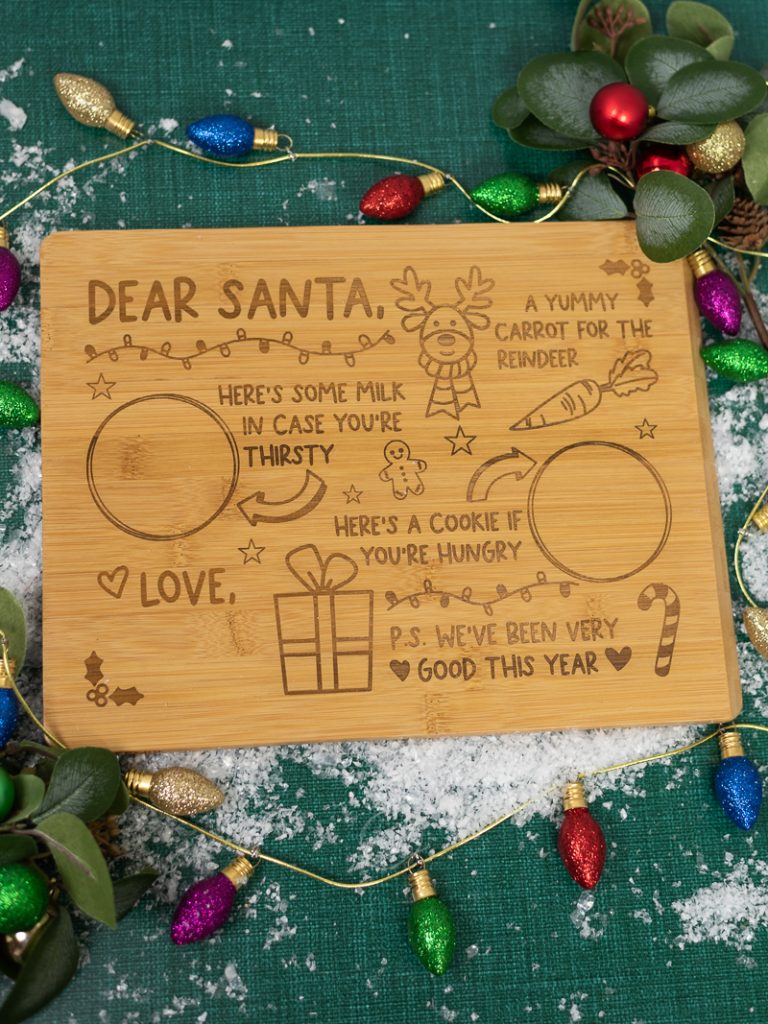
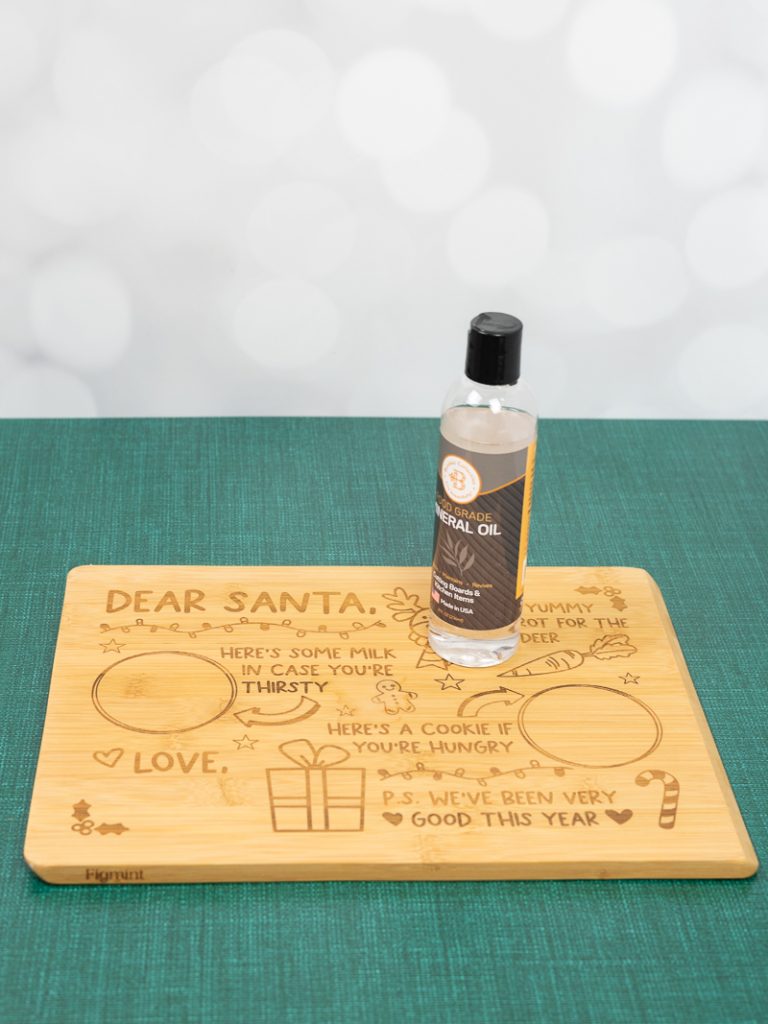
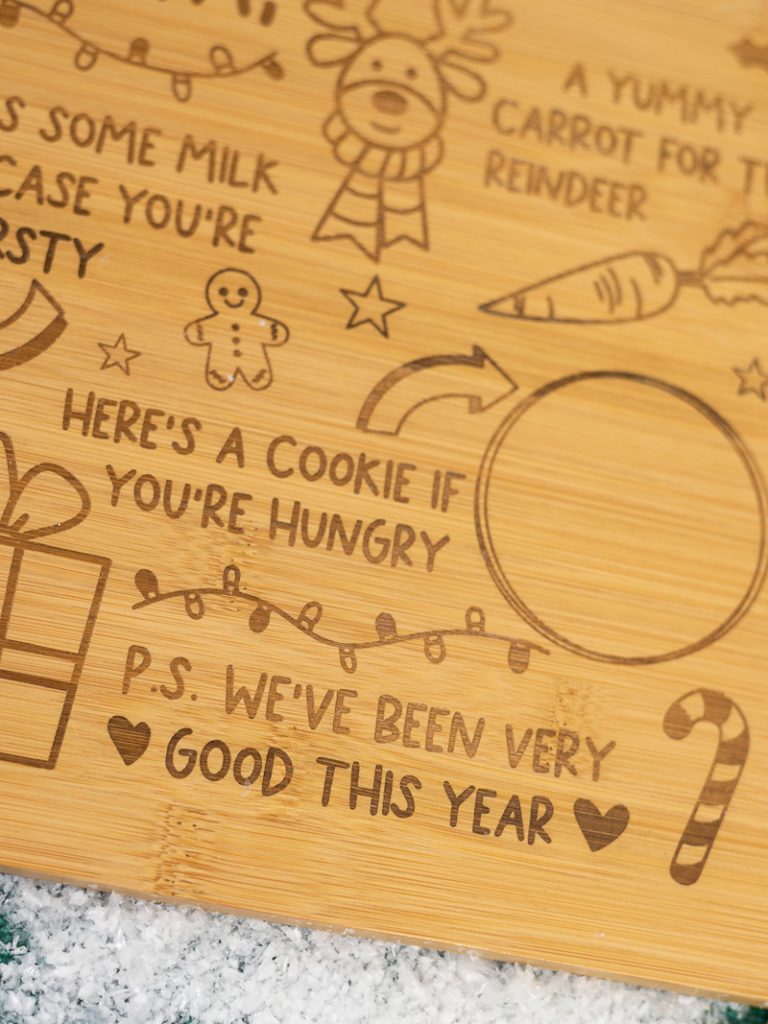
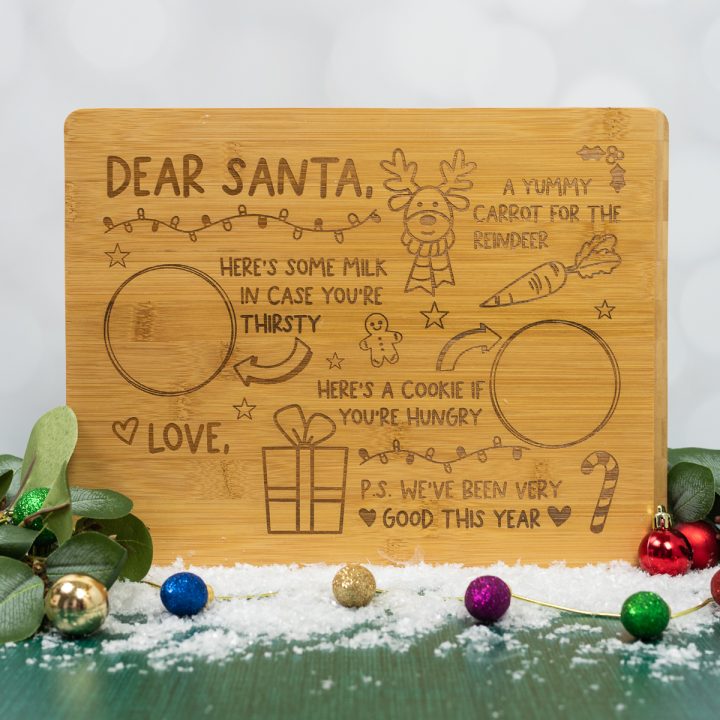
Cookies for Santa Laser Cut Tray
Want to make your own cookies for Santa tray to put out on Christmas Eve? This laser cut tray is easy to cut and customize with the Xtool M1 smart laser.

I’m partnering with Xtool to bring you these fun laser cut crafts! You can read all about my review of the Xtool M1 smart laser here. All opinions are my own.
These cookies for Santa laser cut trays have been popping up all over Etsy for years. They are such a fun thing to have when you have young kids or even grandkids around. Putting out cookies and milk for Santa is one of our favorite traditions and my son is really excited to use his cookies for Santa tray this year!
I love that you can customize your board with your kids names or family name. There’s even an option to put “I’ve been very good this year” instead of “we” for families with one child. And to make it super easy to customize, I linked the font we used for our boards so that everything will match up nicely!
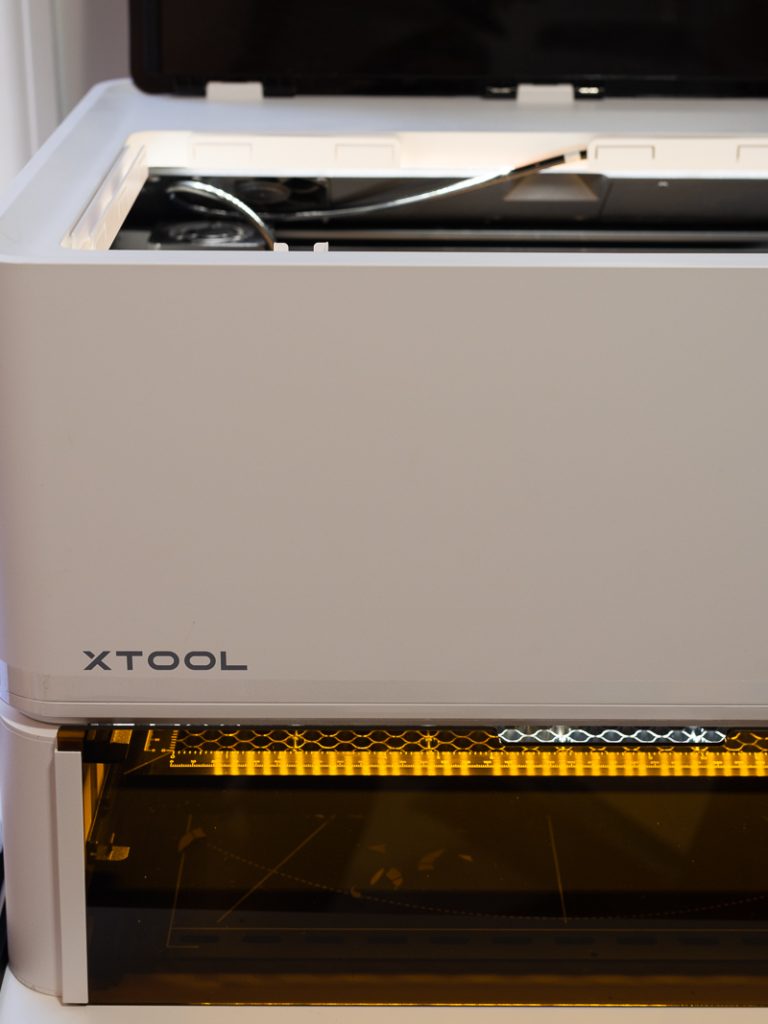
Depending on what cutting board you use (I’ve done this project with both this cutting board that is in this post and, my personal favorite, this cutting board) engraving on a thick board can be a little difficult, which means there’s a learning curve to it. If your board is thick you will need the Xtool Ruler (download it here) to help you measure the distance between the laser and the cutting board.
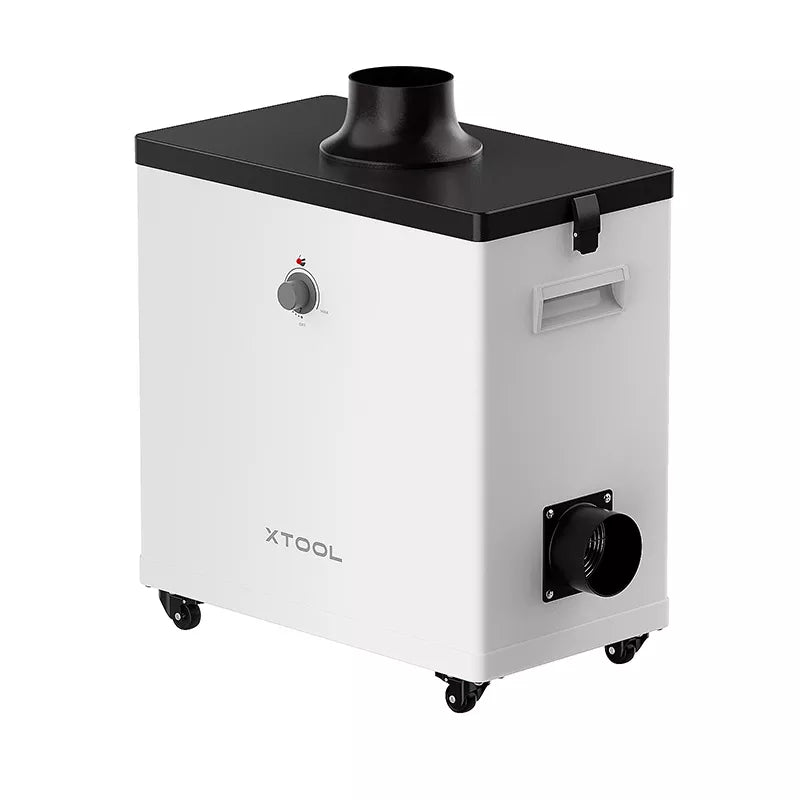
You’ll also need the honeycomb panel, because a thick board will be too tall for the laser to pass over. So you will need to lower the honeycomb panel in order for the laser to be able to engrave your image on the cutting board. And this is also why you’ll need the ruler to measure the distance, because auto measure does not work when you have to move the honeycomb panel down.
You may also need the triangular prisms in addition to the honeycomb panel! The cutting board was still a little too low for the laser to be able to etch so having the extra lift from the prisms helps bring the board up to the right height.
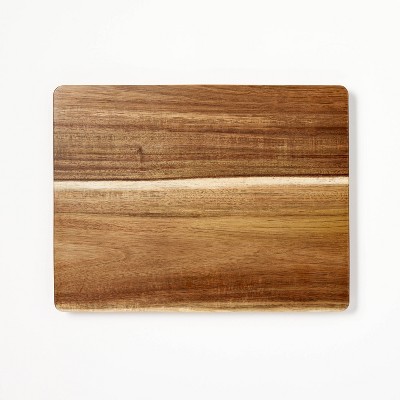
The board I used in this post is not thick enough to need the honeycomb panel. However, if you decide to use the Acacia Board you will need the honeycomb panel and the Xtool Ruler.
The instructions in this post are for a thick cutting board (because most cutting boards are too thick to use without the honeycomb panel). If you have a thinner board, ignore all instructions for a honeycomb panel and engrave like you normally would!
What materials do you need to make your own cookies for Santa laser cut tray?
You will need:
- Xtool M1 with air assist or other laser cutter
- Honeycomb Panel for Xtool M1
- Xtool M1 Smoke Purifier
- Xtool Ruler XCS File
- Wood cutting board (this is the one I used!)
- More Dreams font to customize the name on your board
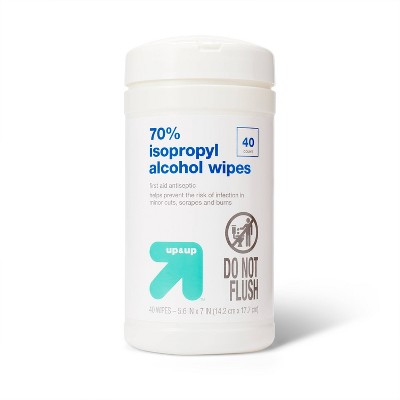
- Alcohol Wipes
- Cookies for Santa SVG Cut File

This post contains affiliate links. I may earn commission from qualifying purchases at no additional cost to you. I will never recommend a product I don’t use or trust.
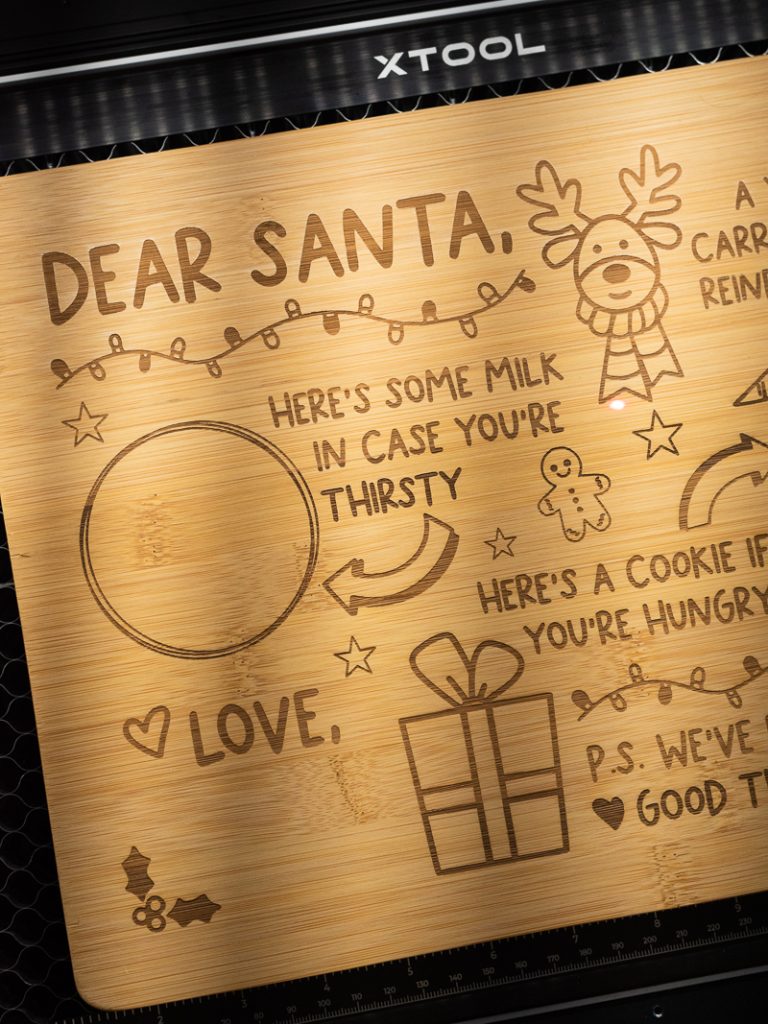
How to engrave a Cookies for Santa Laser Cut Tray
Why do you need the honeycomb panel to engrave a cutting board?
The board is too thick to sit in the top of the M1 for the laser to be able to engrave. The honeycomb panel adds another level to the machine so that you can move your material down and engrave thicker objects.
To do this, you need to follow the install for the honeycomb panel here.
Once you’ve installed the honeycomb panel, you can move your thicker materials down levels so that you can engrave or score on it.
How do you manually measure the distance between the cutting board and the laser?
You will need to download and cut the Xtool Ruler to manually measure!
First, make sure your machine is turned off. Then move the laser so that it sits over top the center of the board (you cannot move the laser when the machine is on which is why you need to turn it off first).
Then, take the ruler and measure from the top of the cutting board to the top of the laser. If the top of the laser does not meet any of the numbers on the ruler, you will need to put something underneath your cutting board to raise it up so that you can properly measure the distance.
Once you find the correct distance, put the number in the box and hit complete.
What settings do you need to engrave on a cutting board?
I highly suggest downloading this power and speed grid to find the perfect engrave settings for your wood. Find a scrap piece of wood and try the settings first. But make sure you’re in the room with it as it’s engraving. The higher numbers may burn the wood and you want to watch and make sure nothing catches fire.
I really liked the look of Power: 60, Speed: 125, Pass: 1, and Lines Per CM: 100.
I also decided to put a signature on the back of my boards so whomever I gave the board to would know who it is from. It was a good way to test if my settings worked and looked good before doing the entire design on the front of the board.
Do you need to use the air assist when you engrave?
It is not necessary but I did have it on when I did this project. Air assist helps move the air around so your wood doesn’t burn as you’re cutting it, and since you’re not cutting wood here it really isn’t necessary.
Some people say it just blows around all the dust from the engraving and it makes everything messy. I did not have this issue but it is up to you. It really doesn’t make a difference here if you have it on or not.
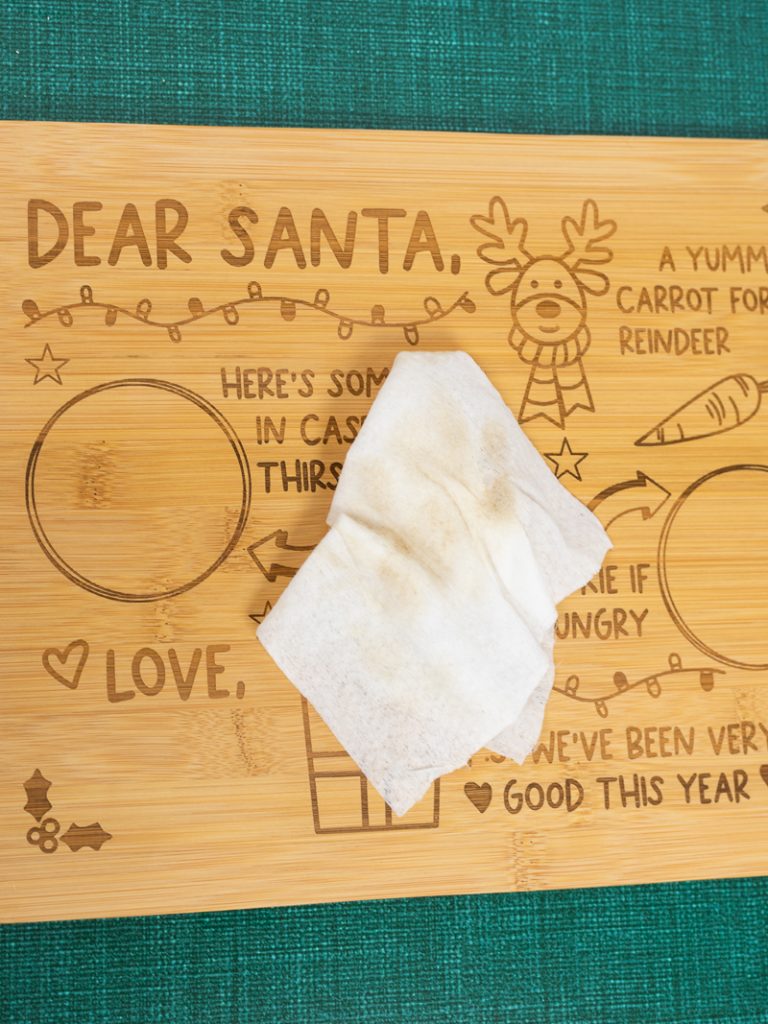
How do you clean off the cutting board after the machine is done engraving?
This is where the alcohol wipes come in to play! You will need a lot of them because they get dirty quickly. Don’t be afraid to rub hard on your design to clean it off. I continued to wipe until the wipes came away clean!
Once you wipe away all the dust your design won’t look as dark as it did when it first comes out of the machine. But you will see more of the wood color underneath instead of black.
Do you need to seal the cutting board after it’s been engraved?
Yes! Sealing it will help keep bacteria from getting in the groves made during the engraving process. I used mineral oil but you can also use food-safe epoxy.
Is a cutting board food safe after being engraved?
No! If you are going to eat off of it put a napkin down underneath the cookie to keep it safe for Santa.
You should never eat off of an engraved cutting board or cut vegetables and fruit on it. If you want to do this, turn the cutting board over and use the side that is not engraved. These types of cutting boards are really for display, you should use a different cutting board for food prep.
How to set up the Xtool M1 to engrave your cookies for Santa Laser Cut Tray
Where can you download the cookies for Santa SVG?
The Cookies for Santa SVG can be downloaded here! The file is also available as a PDF, Jpeg, PNG, SVG, DXF and XCS.
How do you import an SVG into the Xtool Creative Space Software?
Download the cookies for Santa SVG and drag it into the creative space software. Once it is in there you can play with the layers (you will not need to mess with layers for this project since the entire thing will be engraved) and choose whether or not you’re engraving, cutting or scoring your project.
What settings do you need for the cutting board?
Once you connect your computer to the M1 laser cutter you need to put your cutting board in the machine. Then hit REFRESH until you see your cutting board in the Creative Space Software.
Use your mouse and click the cutting board. You should see the cutting board settings on the right hand side of your screen.
Your settings for the board should be:
- Open Plane (you use this because you’re using the honeycomb riser),
- User Defined Material,
- Distance (you will measure this yourself and put the number in here!)
- Processing Path: Auto Planning.
Once you import your file, Group it. Then click on it.
Your settings for your svg file should be:
- Multiple Objects Selected: OUTPUT
- Processing Type: Engrave
- Setting: Manual Setting
- Power: 60%
- Speed: 125
- Pass: 1
- Lines per cm: 100
- Engraving Mode: Bi-directional
How do you center the file on the cutting board?
There are a few ways you can do this but my personal favorite is the same way I center my files in the Silhouette Software.
Use a rectangle that is the same size as the cutting board and line it up on your object in the software. Then put your file in the middle of it.
Click ALIGN on the top toolbar and select Center Horizontally and Vertically. Then delete your rectangle (or select it and then select Objects Selected – Ignore).
One thing I have learned with the Xtool Software is that the laser container doesn’t come all the way to the front of the machine because the box is so large, so you need to make your cut file a little smaller than your cutting board. The easy fix for this is to leave space on the sides for handles. Then your file will be smaller than your board and will center correctly!
How to troubleshoot issues with your laser
Why is the design so light after engraving?
If your power setting is off at all it can cause too light of an engraving or it’ll burn your wood. This is one of the reasons I suggest doing a test grid to find those perfect settings for your board.
You can download the test grid here!
Also, make sure you hit engrave and not score! Scoring is a low power cut and just marks your material.
Can you adjust the settings and engrave the design onto the cutting board again?
Yes! Just do not open the top of the Xtool M1 because you will not be able to get the file lined up on the already engraved cutting board.
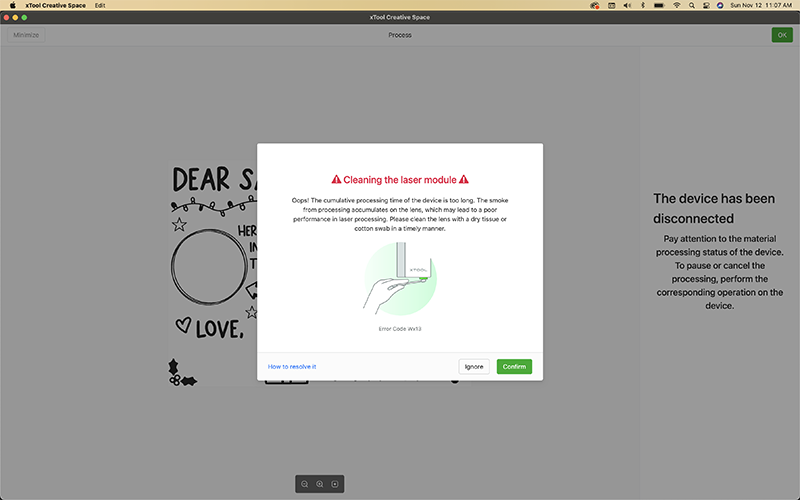
However, this file will take a long time to engrave (it took me 3 hours each time). Both times I got a notification to clean my lens because of how much dirt was on it. So my advice is to perfect your settings before you engrave (do that test grid!) because if you have to clean your lens after the first pass you will not be able to get the file lined up to do a second pass.
Need to clean your lens? Follow these instructions to get it squeaky clean.
Cookies for Santa Laser Cut Tray
Download the free svg cut file to make your own Cookies for Santa laser cut tray!
Materials
Instructions
- Turn on your machine, the smoke purifier and air assist. Connect your computer to your M1.
- Move the honeycomb panel to the top shelf in the riser. Put your cutting board on the honeycomb panel and hit refresh in the right hand corner in the Creative Space Software. You should now be able to see the cutting board in the software.
- Click on the cutting board and adjust your settings in the toolbar on the right side of your screen. Make sure you click OPEN PLANE for the honeycomb panel.
- For distance, you will have to manually measure the distance between the laser and the cutting board using the Xtool ruler. Put the number you get after measuring in the DISTANCE box.
- Drag and drop your cut file into the software and then size it to however big you want it.
- To center the design, draw a large box that is the same size as your cutting board. Select the box and the cut file and align it horizontally and vertically. You can either delete the box or select and hit IGNORE under Output in the toolbar on the right hand side.
- Click on the design and adjust all of your settings. Remember to hit ENGRAVE for Processing Type. If you've done the test grid, input the numbers for Power and Speed that look the best from your test grid. The numbers I used were POWER: 60 and SPEED: 125.
- If everything looks good to you, hit PROCESS. Then hit START. Remember, do not leave your machine unattended while it engraves!
- Once it is done remove the cutting board from your machine.
- Use alcohol wipes to scrub the surface of your cutting board to remove all the dirt. You'll use a lot of wipes because you want to keep doing this until they come off clean!
- Follow the directions on the back of your food-safe mineral oil. After you finish this step your board is ready to use!
Recommended Products
As an Amazon Associate and member of other affiliate programs, I earn from qualifying purchases.