
DIY Printed Heat Transfer Vinyl Earrings
This post contains affiliate links. I may earn commission from qualifying purchases at no additional cost to you. I will never recommend a product I don’t use or trust.
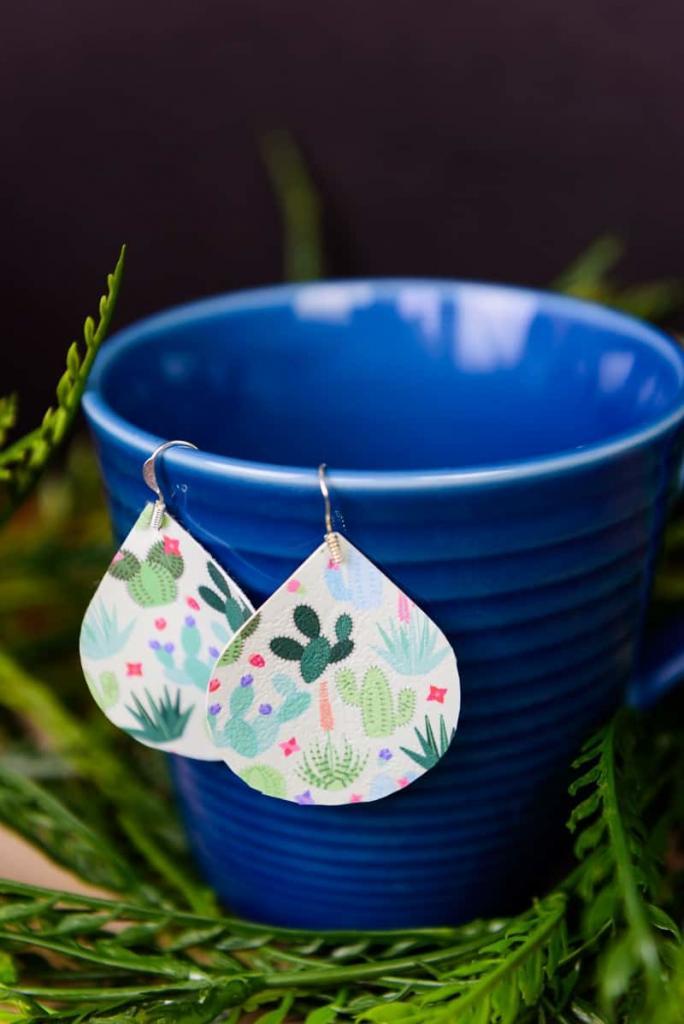
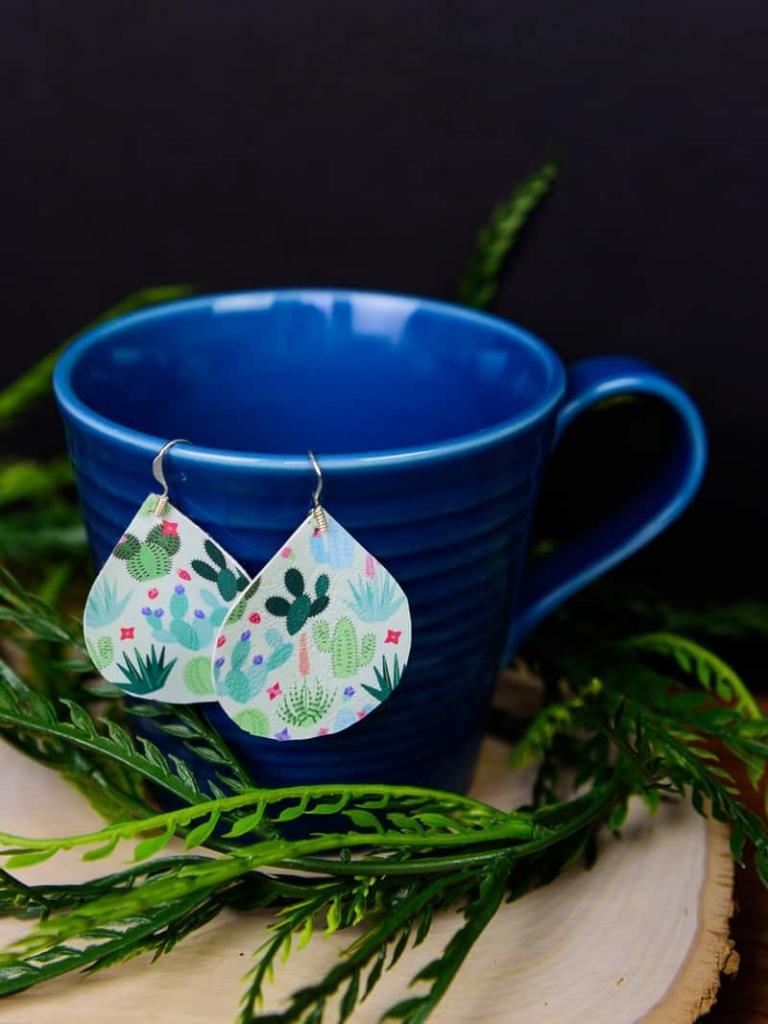
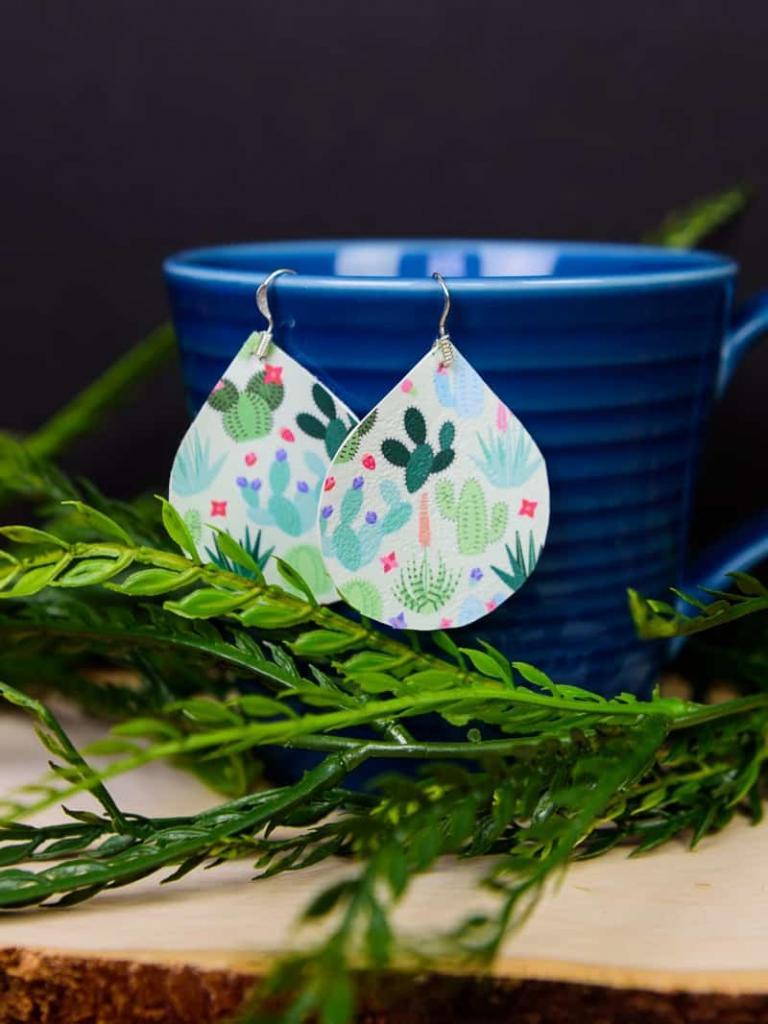
Heat transfer vinyl goes on everything! Just like these faux leather printed heat transfer vinyl earrings.

YOU GUYS.
I really thought that I knew everything heat transfer vinyl could go on. I didn’t think there was any way I could be more obsessed with it.
And I was wrong.
Did you know you can use it on faux leather when you make earrings?
Well, now ya do! ?
It’s pretty awesome to know that you can pretty much make earrings in every color, pattern, and design if you use heat transfer vinyl. And this is the perfect craft to use up all those scraps you have laying around too!
Seriously. Printed heat transfer vinyl earrings….who knew?!
I was checking out this thread on Facebook and someone posted a pair of earrings they made that were monogrammed and everyone was asking about them. Do you use 651? Paint? Heat transfer? What kind of voodoo magic did she use to get it to stick?!
A few people said 651 (which is permanent vinyl) works but there was one person who said heat transfer and I decided to go with that. Mostly because I had just gotten some patterned vinyl from Expressions Vinyl (they have the CUTEST prints!) and I wanted to use them for something other than t-shirts. ?
And you know what? It worked so well. I was a little afraid of burning the vinyl and the faux leather with my EasyPress but I kept my temperature low and didn’t press long and I didn’t have any problems.
Now that I know I can put heat transfer vinyl on my earrings, it’s game over. Because I’m going to monogram and dress up all the leather things now!
These printed heat transfer vinyl earrings are:
- colorful,
- easy to make, and
- stylish!
Want to make your own printed heat transfer vinyl earrings?
Materials:
- Faux Leather (you can find rolls in the ribbon section at Hobby Lobby!)
- Deep Cut Blade for your Silhouette
- Earring fishhooks
- Earring pliers
- Silhouette weeding tool or needle
- Printed Heat Transfer Vinyl (mine is the cactus print from Expressions Vinyl)
- Cricut Easy Press or Iron
- Teflon Sheet
- Silhouette Cameo
Tutorial to layer the printed heat transfer vinyl on top of your leather:
PRO TIP: Tape your Faux Leather to your Silhouette mat using painters tape! It holds it in place.
+ If you’re using a deep cut blade, your settings should be BLADE: 6, SPEED: 3, and THICKNESS: 33.
+ Load your faux leather into your machine and hit CUT. You may have to cut it twice if it doesn’t cut all the way through! I did not, but it depends on the thickness of your leather.
+ Now load your heat transfer vinyl into your cutter, change the settings, and hit CUT.
+ Heat up your iron or easy press.
PRO TIP: My Easy Press settings were…HEAT: 250 and TIME: 10 seconds.
+ Layer your heat transfer vinyl on top of your leather and put your teflon sheet on top.
+ Using your iron or easy press, press your vinyl onto your leather for 10 seconds.
+ Pull up the transfer sheet on top of your heat transfer vinyl. If the heat transfer is not stuck to your leather, press again!
Tutorial to make your earrings:
+ Poke a hole through the top of your earring with a needle or your Silhouette weeding tool.
+ Use your earring pliers (found in the jewelry aisle at Michaels), pry the small circle at the bottom of your fishhooks away from the earring.
+ Loop it through the hole at the top of your earring and then close the hole with your pliers.
Okay, so I know that’s a lot of steps. And it looks a little daunting at first glance.
But really, I promise that this project couldn’t be easier and doesn’t take a long time at all. Maybe 20 minutes if this is your first time making earrings OR if your Silhouette decides to be difficult.
Which happens to me way more often than I’d like to admit!
Seriously though, this is such an easy and fun craft! And with Expressions Vinyl‘s new line of patterned vinyl I’m already dreaming of all the fun earrings I can make!
Buffalo Chex earrings for Christmas anyone? ?
Want more leather earring inspiration? Check these out!

Can I iron the vinyl on before I cut it?
Hi Lisa! Yes you can, but I would advise against it. You’ll be putting heat on the sheet of HTV and I’m not sure if you’ll be able to use the rest of it after exposing it to heat without putting it on anything. If you want to press before cutting your vinyl I’d suggest cutting a small rectangle or two small squares to put on top of the faux leather and press. Then cut after that. Don’t use the whole sheet!
My earrings seem to curl up after I pile the plastic covering off. I used siser easyweed htv and glitter htv. I was using my EasyPress at 250 for 30 seconds. Any tips on how to avoid that.
Hi Mary! Only press them for 10 seconds before trying to pull the carrier sheet off. If the htv hasn’t stuck do it again for another 5 seconds. Pressing for 30 seconds is too much and is probably what is causing the curling! 🙂
Can I make earrings like this with a cricket joy?
I do not own the Cricut Joy so I am not 100% sure. But if can cut faux leather then yes!