
How I Edit My Disney World Photos
Even though coming back from a Disney trip is a terribly sad thing, there is one thing I love about coming home (besides sleeping in my own bed). It’s the only thing that keeps me from taking the car and running right back down to my happy place, and that is coming home to edit all my vacation photos.
On our last trip, I met a really nice man who talked to me about photography for a good hour while waiting for a fireworks show. He even recommended the book The Adobe Photoshop Lightroom 5 Book for Digital Photographers (Voices That Matter)![]() when I told him I really wanted to learn how to use the photo editing software, Lightroom
when I told him I really wanted to learn how to use the photo editing software, Lightroom![]() . I bought the book before we left that way it would be waiting for me when we got back home and I could start editing all my Disney photos!
. I bought the book before we left that way it would be waiting for me when we got back home and I could start editing all my Disney photos!

While we were at Disney World, we got stuck on Pirates of the Caribbean. This is quite normal for us, and while I usually view it as an annoyance this time I decided to take advantage and snap a few pictures.
The cast members had turned on all the lights and had shut down the ride completely while we were on it. They ended up having to get in the water and push the boats towards the emergency exits just to get us all off the ride. This is the before picture I snapped while waiting to get off at an emergency exit.
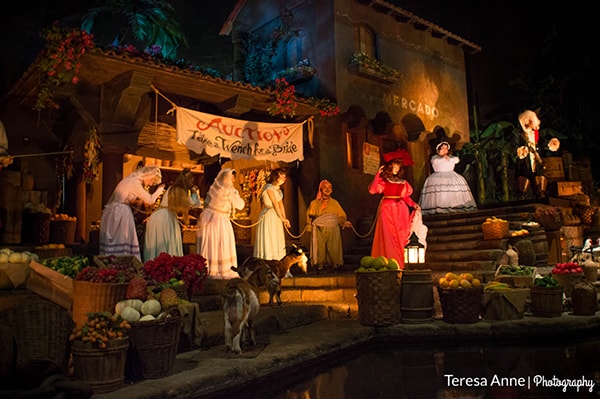
It’s pretty grainy in the shadows, and since the lighting isn’t great inside the ride everything looks very yellow.
Here are the steps I took to make this image look better:
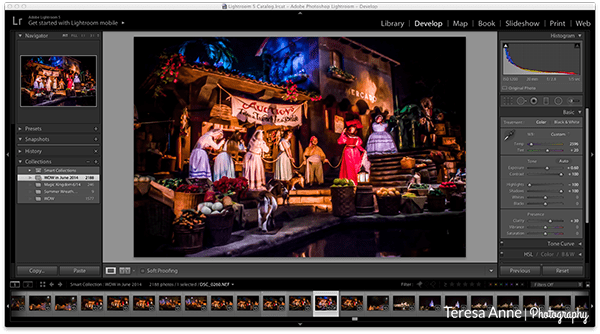
Here I was able to use the tools on the righthand side to edit the photo. First I slightly adjusted the white balance so the photo wouldn’t look so dark, then I upped the contrast to 100. After that, I adjusted the highlights and shadows and then upped the clarity.
Once I was done with all of that, I clicked on the HSL/ Color/ Black & White tab and began to play around with the colors in the photo. You can enhance them however much you want, but be careful! Too much adjusting and your photos will look fake!
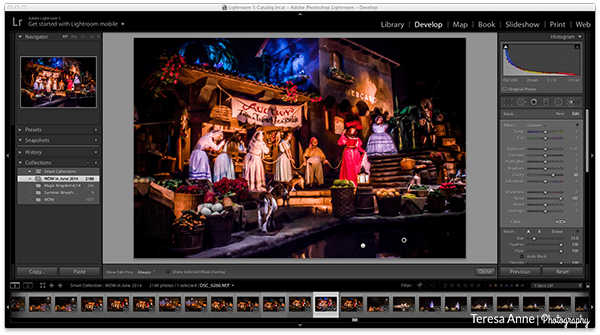
To edit the noise reduction, I clicked the letter ‘K’ on my keyboard to get to this screen. Double click on Effects to bring all the tabs back to zero, then pull the noise slider all the way to the right (+100). Hover over your image and you’ll see a large circle appear, then left click your mouse and drag the circle all over the shadows in your image. It’ll reduce the noise in the areas you want and make everything look so much better! I also upped the clarity in this step just a tad as well.
With all the adjusting I was able to pull out all the great colors of the scene and get rid of the yellow tint in the photograph. Here is the final result:
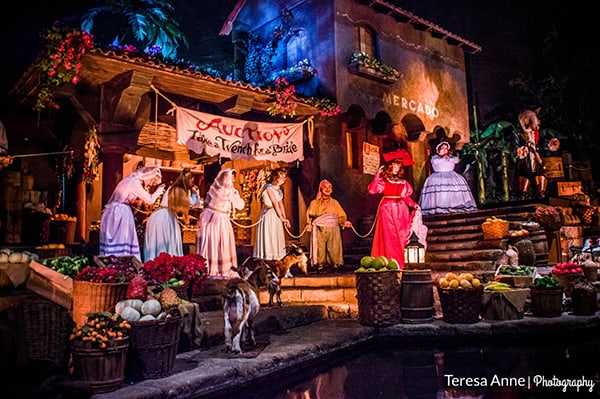
Pirates was my first dark ride capture and I’m really loving it! Lightroom![]() made it so easy to enhance the photo and I am incredibly pleased with the final result. In fact, I’m having so much fun with Lightroom
made it so easy to enhance the photo and I am incredibly pleased with the final result. In fact, I’m having so much fun with Lightroom![]() that I wanted to share some other great edits I was able to do with the program!
that I wanted to share some other great edits I was able to do with the program!


There are so many amazing things to photograph at Disney World and I love looking through all the pictures I took and picking out the best ones of the group. My favorite part this time has been learning Lightroom![]() and finding out how to edit my pictures in the best ways possible.
and finding out how to edit my pictures in the best ways possible.
This post contains affiliate links. I may earn commission from qualifying purchases at no additional cost to you. I will never recommend a product I don’t use or trust.
What do you think?
What program do you use to edit your vacation photos? Do you have a favorite photo editing program?
Love love love this post. I love Lightroom. I’m actually planning to take a Skillshare class to learn how to edit photos better with lightroom 🙂
Thank you, Madison! I love Lightroom too, and I’ve only been playing around with it for about a week. haha You’ll have to tell me how the class goes! I’m so curious!