
How to Remove Heat Transfer Vinyl From T-Shirts
Have you ever needed to remove heat transfer vinyl from shirts? You can find Vinyl Letter Removing Solvent on Amazon, and use it to remove heat transfer vinyl designs so that you can reuse your shirt even if you mess up your design!

I’ve messed up a lot of shirts in the past few years. And I used to think that if I messed them up that I had to throw them away.
(this is my most viewed screw up….and I’m still mad about it)
I hated making mistakes because I not only wasted vinyl but I also wasted shirts. And that’s a lot of money to just throw away. Because what else could I do with it (besides cut it up for cleaning rags)?
Last year a friend of mine told me about a way to remove heat transfer vinyl from shirts and it has been such a huge lifesaver when I’m crafting! It’s one of my favorite tools to have sitting around and I always keep it stocked.
Materials Needed to Make Shirts with Heat Transfer Vinyl
You will need….
This post contains affiliate links. I may earn commission from qualifying purchases at no additional cost to you. I will never recommend a product I don’t use or trust.
What is VLR?
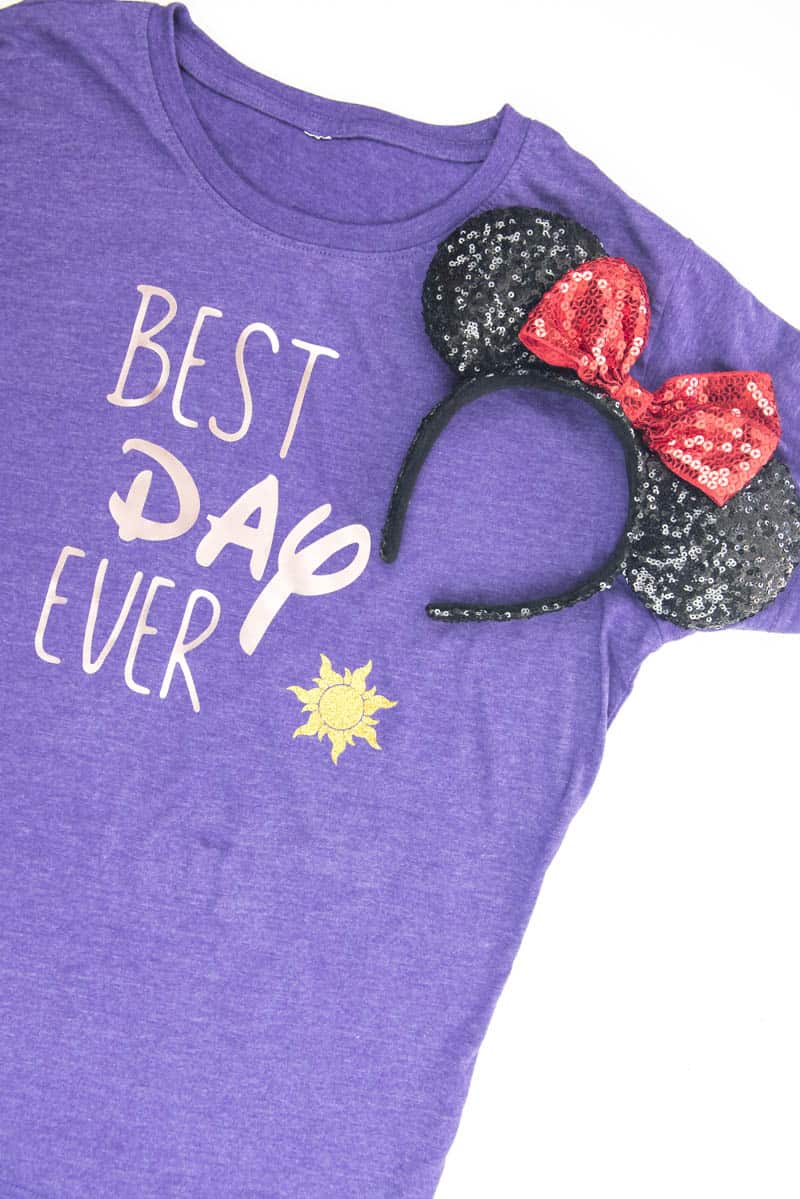
VLR is letter removing solvent and it will quickly remove heat transfer vinyl so you can start over. I started out with this shirt from two years ago for a random Rapunzel themed Disney trip with my boys.
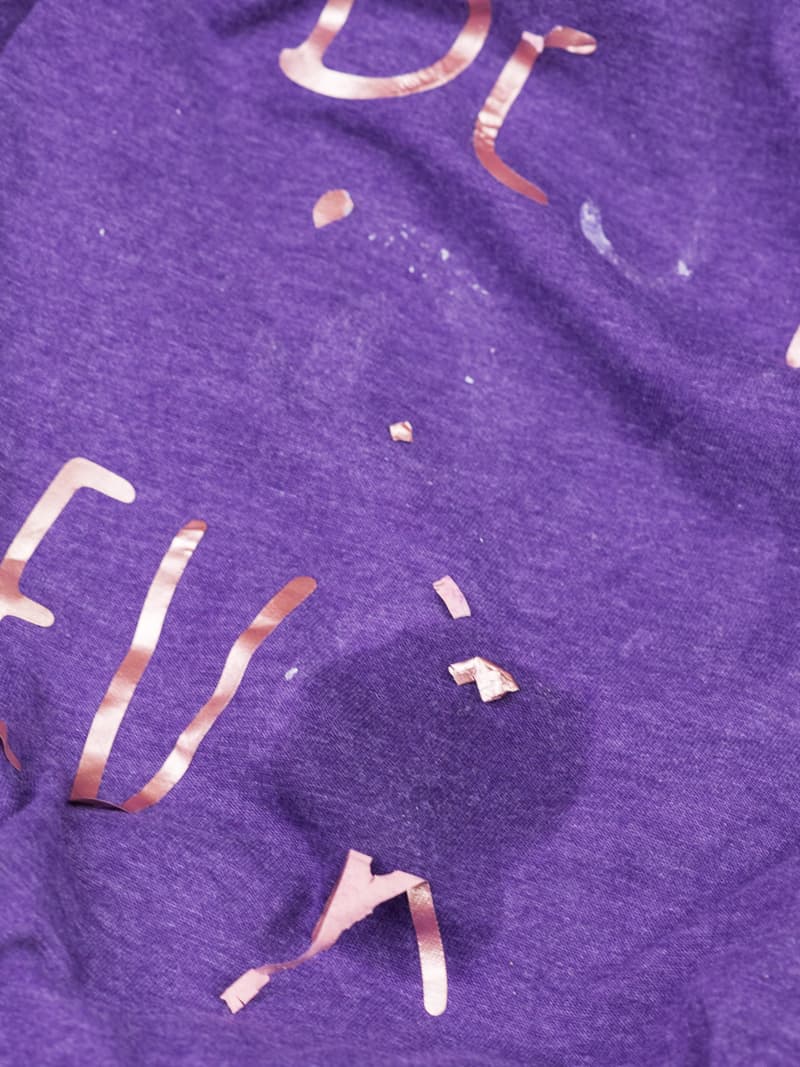
But after I came home from Disney and washed it I ended up with this.
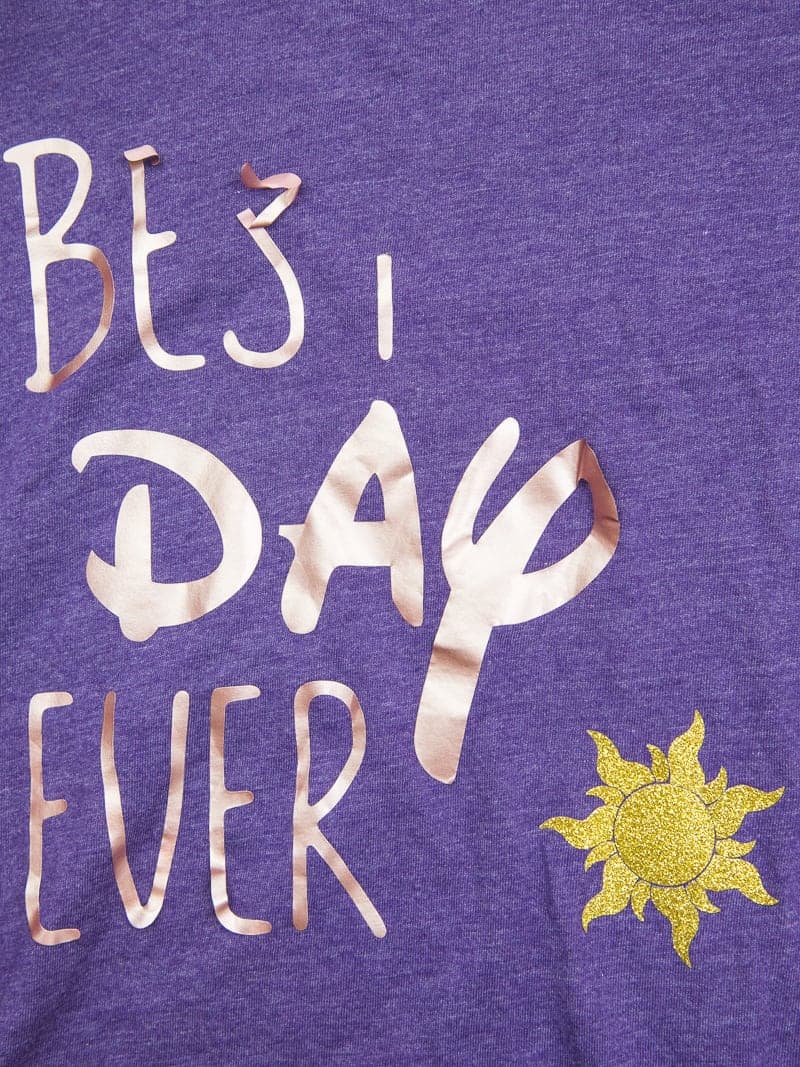
That glitter vinyl wasn’t budging at all but the rose gold heat transfer vinyl was a goner. The shirt stayed in a drawer for the past 8 months before I realized I could take of the vinyl with the solvent and redo it.
I know that the bottle is a little expensive but you only use a very little bit to remove your HTV so the bottle will last a very long time. I’ve had mine for a year and it still is almost full.
If you run a business making shirts you may go through yours a little more quickly than I do, but it’ll still last you a while and it’s an invaluable tool to own!
How do you use VLR?
- Turn your shirt inside out and pull on the fabric a bit. This will help “loosen” up the vinyl before you put on the solvent.
- Put a small amount of the solvent on your shirt where you want to remove the vinyl. Start pulling your shirt to loosen up the vinyl until you are able to pull it up off the shirt. Continue doing this until all the vinyl you want to remove is off of the shirt. Remember, a little goes a long way!
- You may see bits of adhesive residue left on your shirt. Throw it in the washer and dryer, then get back to crafting!
It’s really that easy! Just make sure you’re doing this in a well-ventilated area, this stuff smells and will give you a headache.

Faq’s to stop your heat transfer vinyl from lifting after throwing it in the washing machine.
Why does vinyl peel up after you’ve washed and dried the shirt?
If you’re not putting even pressure on your design when you press it, it won’t adhere to the shirt correctly. That makes it easier for the vinyl to lift. You want even pressure on the entire design. If you’re using an iron or a smaller EasyPress that might be a little harder on larger designs. Just be extra careful that you move the press or iron over every piece of the design.
Should I hand wash my shirt or is it okay to put it in the washing machine?
I always put my shirts in the washer and I’ve never had a problem with the vinyl lifting. Just make sure you turn your shirts inside out before you throw them in!
Is it better to hang your shirt to dry?
Yes. I never throw my shirts in the dryer (unless Chris is throwing a load in and I forget to tell him to pull it out). Heat is what can cause vinyl to lift if it’s not pressed well so I tend to err on the side of caution and just hang my shirts up to dry. The vinyl lasts longer that way!
Why does my design look stretched when I put my shirt on?
This typically happens if you have a large chest or broad shoulders. If your vinyl is stretching when you wear your shirt then that will loosen the adhesive backing and cause the vinyl to lift. Usually stretch vinyl on your shirts works best. It will stretch with your shirt instead of against it and therefore the adhesive tape will stay in place and your vinyl will not come off.
What tool is best if you want to make sure you always get a good press on your shirts?
Nothing is ever foolproof but a heat press is what will give you the most consistent pressure out of any tool. It is also bigger (15×15) so you shouldn’t have to press any design more than once, unless you are doing a layered design!
An EasyPress is also good if you do not have a lot of room in your home or craft room. But you typically will have to press more than once and that can cause variations in pressure. So you just have to be more careful when using it that you are consistent.
More heat transfer vinyl t-shirts to make!
- Layered Harry Potter Shirts,
- How to Use HTV on Shirts,
- How to Distress HTV for a Game of Thrones Shirt
- Wonder Mom Superhero T-Shirt
- Made in the 80’s Birthday Shirt (plus a free file!)

How To Remove Heat Transfer Vinyl From Shirts
Use letter removing solvent to remove heat transfer vinyl from your shirts when you screw up!
Materials
- T-Shirt
- VLR Letter Removing Solvent
Tools
- Cricut EasyPress
- Heat Transfer Vinyl
- Silhouette Cameo
Instructions
- Turn your t-shirt inside out.
- Apply a few drops of the solvent on the underside of the vinyl.
- Stretch (or pull) the fabric where the mistake is until the vinyl easily pulls up off the fabric.
- Throw the garment in the washer and then line dry it before reapplying vinyl.
- Recut your design (or do something new!) and weed it. Don't forget to mirror your design before cutting it!
- Use your Cricut EasyPress to press the design on the shirt. Make sure you're using consistent pressure on your entire design!
Notes
- Only use the solvent in a well-ventilated area. It smells and if you don't you will get a headache!
- I recommend washing the shirt after using it but if you're in a hurry you can just repress you design after if you need to. I've done it before and while I prefer washing it sometimes that just isn't possible.
Recommended Products
As an Amazon Associate and member of other affiliate programs, I earn from qualifying purchases.


Hi, most of the time this product works great, but I tried to remove black HTV & it left some black spots that won’t come off for nothing.
My best advice would be to use some Dawn dishsoap and put it on the spots. Let it soak for an hour or so and then try to get the spots off. I’ve tried that on leftover glue before and it has worked getting up the leftovers. Please let me know if that works and good luck!
Hi, do you know if I can put HTV overtop of previous HTV residue?
Hello! I would try to remove as much as you can and if there is residue wash your shirt before putting HTV on again.
I used this stuff recently for the first time. It’s important to know, if you’re wearing nail polish, it can be damaged! I got some of the liquid on my fingertip and as soon as I realized what was going on, I stopped and washed immediately. I was able to save the polish, but the top coat was damaged. Do you know whether it will “melt” latex gloves? I haven’t tried that yet.
I have never had issues with this ruining my nail polish or having to wear gloves so I can’t say for certain latex gloves would work for you. I would definitely try it and see if you get your nails done often and need to protect your hands.