Understanding Aperture
Hey y’all! I’m so excited to be back for another week to continue the Shooting in Manual series! If you are wondering whether Manual Mode is right for you, check out my pervious post on breaking up with auto.
There are three pillars in photography: Aperture, ISO, and Shutter Speed. Aperture seems to be the most talked about because of the blurred background it can provide or how it brings everything into focus. Today I want to talk about Aperture. What is it? Why is it important? And how do I use it?
I hope you are you ready to find out!
This post contains affiliate links. I may earn commission from qualifying purchases at no additional cost to you. I will never recommend a product I don’t use or trust.
What is Aperture?
In photography, aperture is expressed in f-numbers. These f-numbers (known as t/stops) describe the size of the aperture, or how open or closed the aperture is. The lower your f/stop number, the bigger the hole is that allows light to enter your camera will be. The higher your f/stop number, the smaller the hole that allows light will enter you camera will be. So, to refresh:
Lower f/stop = more light
Higher f/stop = less light
When I was first learning about f/stop, I had a hard time remembering that low f/stop meant that more light would enter the camera. I would shoot a ton of pictures during the day and then get home to realize that the majority were washed out because my camera settings weren’t right. While the aperture, shutter speed, and ISO all play a large roll in whether or not you’ll get washed out photos, we’re just going to focus on the one for today. And the faster you memorize this section, the easier the next few lessons will be!
How are Aperture and Depth of Field related?

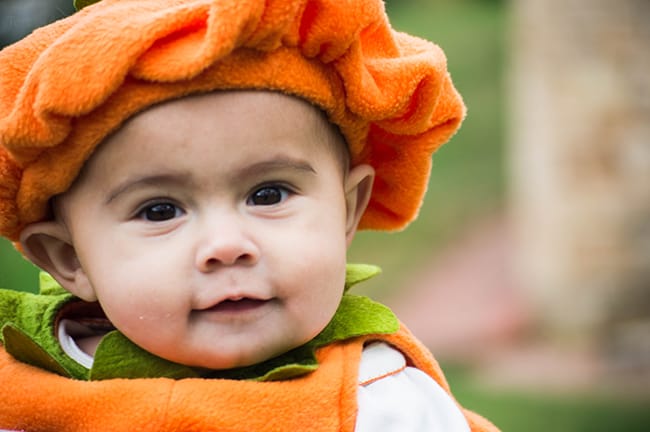
Depth of field is how sharp your pictures are in front and behind a subject. If you are using a low f/stop, then the background behind your subject will be incredibly blurry (like in the top left picture). If you are using a high f/stop, then your photos background will be sharp (like in the bottom right picture).
Most photographers use a low f/stop for portrait photography. Lower f/stops isolate your subjects and gives you that coveted blurry background (known as bokeh). Most people think of blurry backgrounds as giving pictures a professional look which is why many people tend to shoot portraits that way.
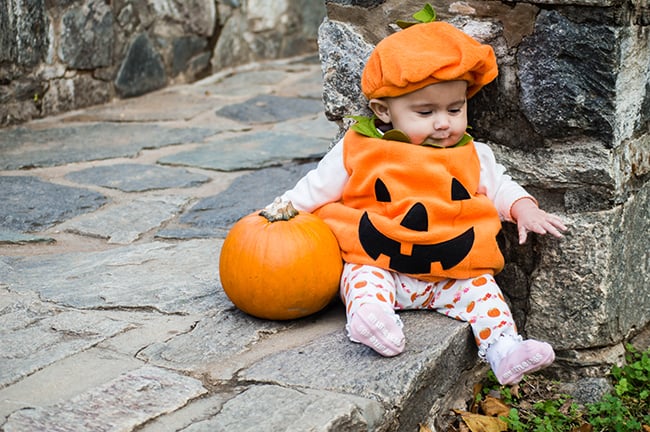
I use higher f/stops for landscape photography the most. Especially when I am shooting a subject that is further away and I want to capture the detail of it with my camera.
How to tell the minimum and maximum Aperture on a camera lens
Every camera lens has a limit on how small or large the aperture can get. You can always find the information right on the lens itself, as shown on the image below.
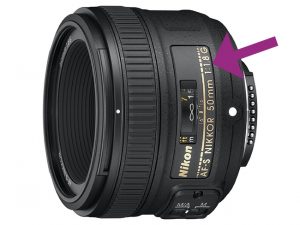
The maximum aperture of a lens is so important, because it shows you the speed of the lens. The pictured Nikon lens above is considered as fast lens due to its 1.8 aperture because it is able to pass through more light than a lens with an aperture of 5.6. This is why lenses with larger apertures are better suited for low-light photography.
On the other hand of that coin, most modern lenses have a minimum aperture of 16 to 22. These types of lenses are great for everyday photography needs like portraits and landscapes.
The Challenge
This week, I challenge you to get out your camera and put it in Aperture Priority Mode (you may have to look to your camera manual to figure out how to do this). Aperture Priority Mode is a semi-auto mode your camera has that picks the shutter speed for you while you play around with different aperture settings. Take shots during the day and in the evening using different f/stops so that you can see the difference in the aperture settings on your photographs.
During the day, set your camera to these settings:
- Aperture Priority Mode
- ISO 200 (if it’s sunny) or 400 (if it’s overcast)
- Maximum f/stop your camera can go and take a picture
- Minimum f/stop your camera can go and take a picture
During the evening, set your camera to these settings:
- Aperture Priority Mode
- ISO 1600
- Maximum f/stop your camera can go and take a picture
- Minimum f/stop your camera can go and take a picture
If you’re not sure how to set your ISO, check your camera manual! That will be your best friend through these lessons so please keep it close as you are learning.
Next week we’ll talk about Shutter Speed, so if you like taking action shots of your children’s sporting events this is one you’ll want to check out!


This is great! Thank you!
great information. I am always experimenting with this. But I tend to use a low f/stop most often, especially with my food photos.
visiting from The Wednesday Roundups